
iMovie can be a powerful tool, making it easy for you to edit your videos. But it does come with a significant downside. It can take up a lot of disc space. Here is the best way to manage your iMovie library size not to take up too much space.
Why Does the iMovie Library Take up so Much Space?
There are three common reasons why iMovie libraries take up so much space:
- You might not be removing files from the trash file, so they stick around.
- You might have a lot of render files.
- Each update will install new files on top of the old ones.
Many people have the same odd experience when using iMovie. There is nothing in their library, yet their computer reports that it is still taking up a lot of space. There are a few reasons why this might be happening:
Library Files Still in Trash
First, you might not be able to remove files that you thought you had deleted. Just because something is no longer in your iMovie library doesn’t mean that it’s gone. iMovie will send it to the trash file, where it takes up a lot of space.
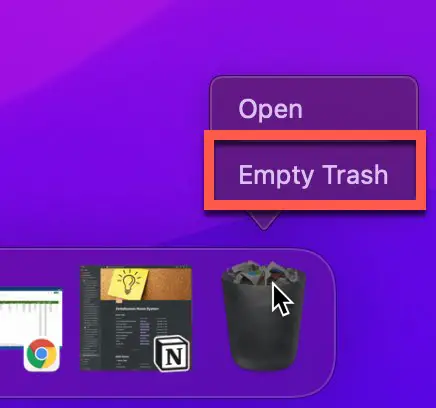
Clear out your trash file by right-clicking on the trash can in the lower-right-hand corner of your MacOS screen and selecting “Empty Trash”.
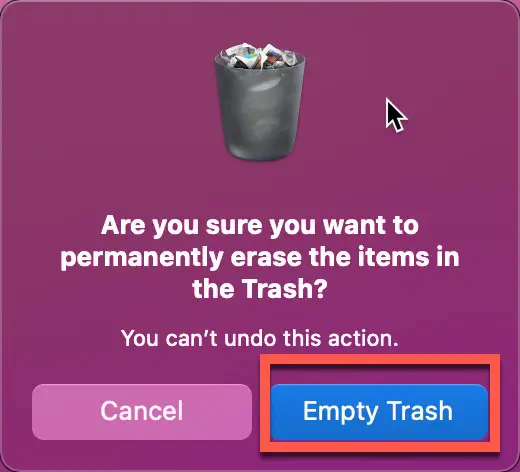
You will then see a pop-up dialog box like the one above. Click “Empty Trash” to confirm that you want to empty out your trash.
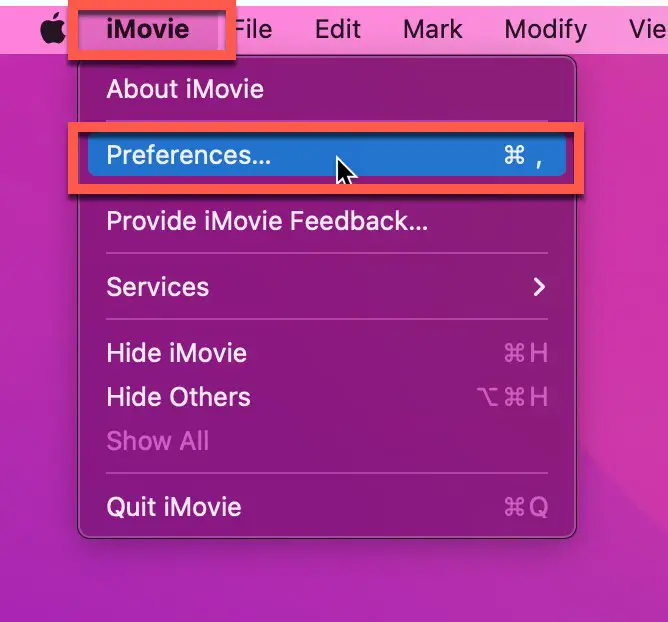
Need to Delete Render Files
Also, you will need to delete any render files. These have been used to help keep track of the changes that you have made to the original movie file.
To delete your render files in iMovie, do the following:
- In the main menu, go to iMovie -> Preferences
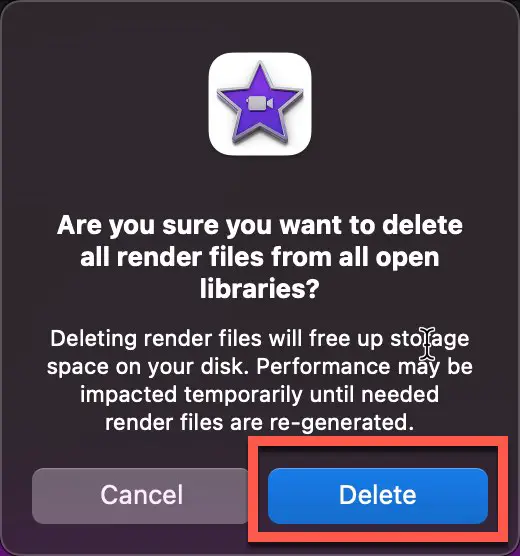
- Click the “Delete” button in the Render Files option as shown in the screenshot above
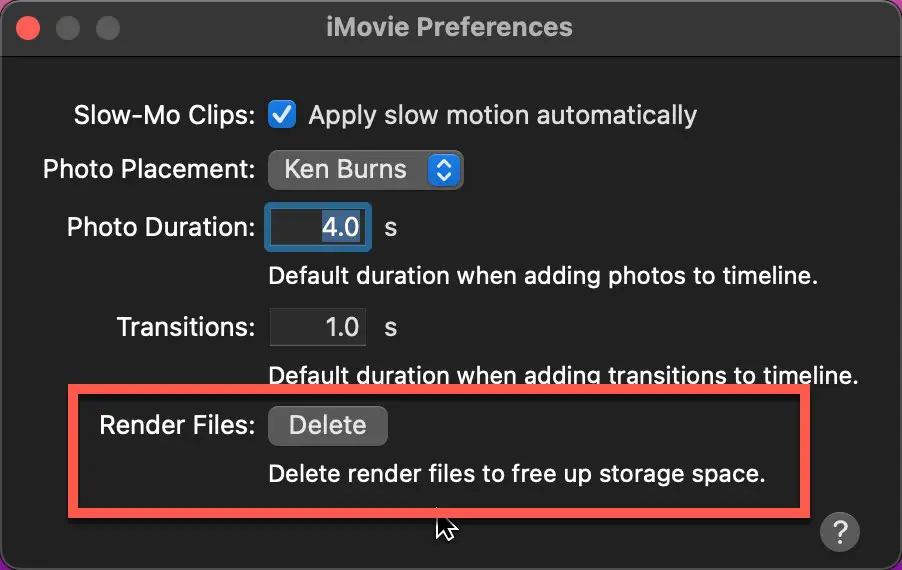
- Confirm you want to delete the render files by clicking the “Delete” button again as shown above
Your render files will now be deleted and your iMovie library file size should be reduced.
Files from Older Versions Still There
Another common issue is that you might have upgraded to the latest model. Each time you do this, the files from older versions will be kept, in addition to the ones needed to run the latest model.
There is an amazing iMovie course, The Complete Guide to iMovie from Beginner to Expert that I recommend you check out.
What is Stored in iMovie Library?
Primarily, your iMovie library features the data from each of your movie projects: video, audio, and images of each project. Every time you make a change, they are saved automatically.
To see what files are in your iMovie Library, do the following:
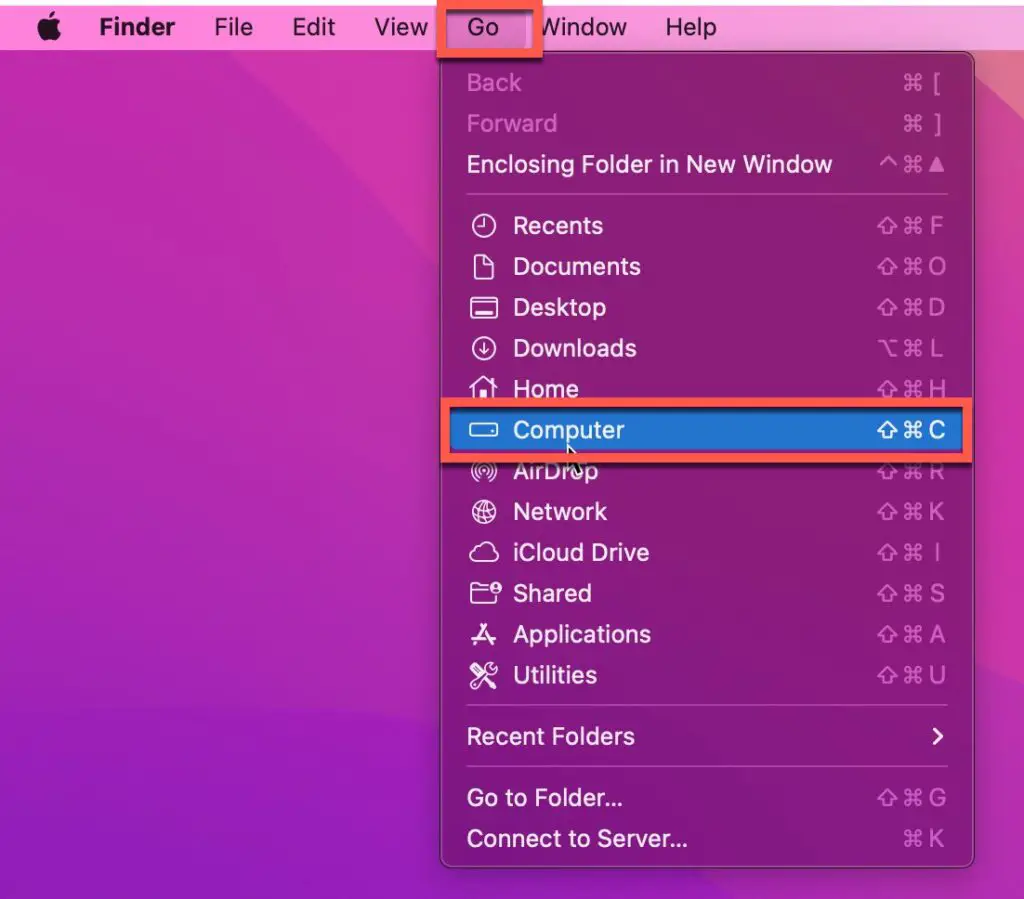
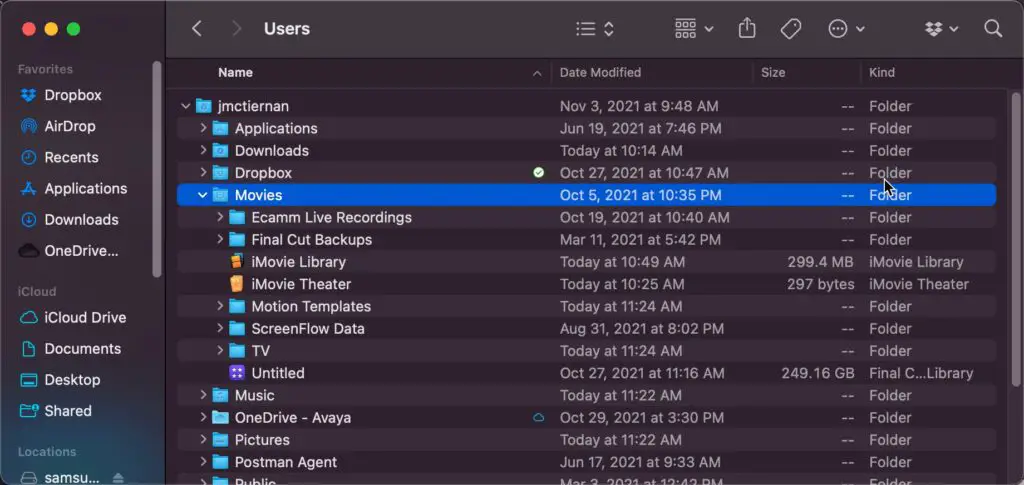
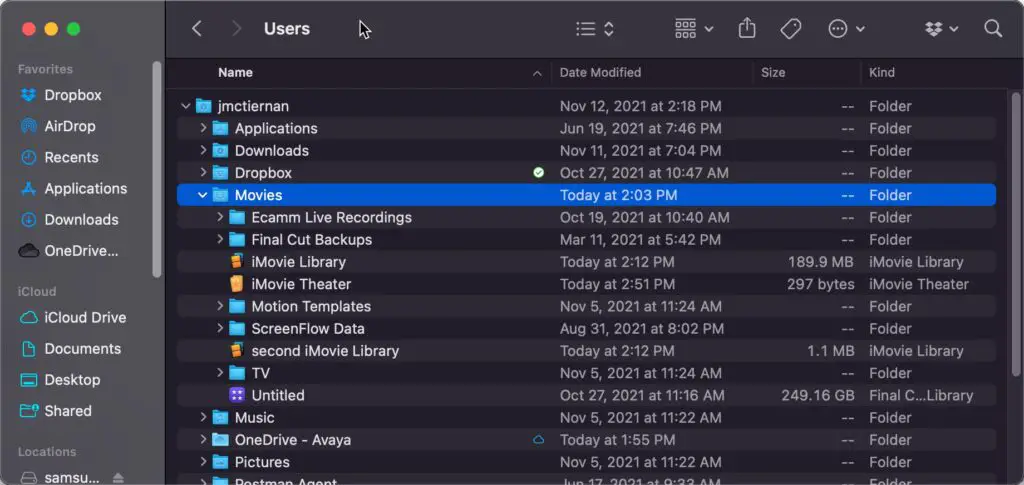
- Open Finder and, in the main menu, click Go -> Computer
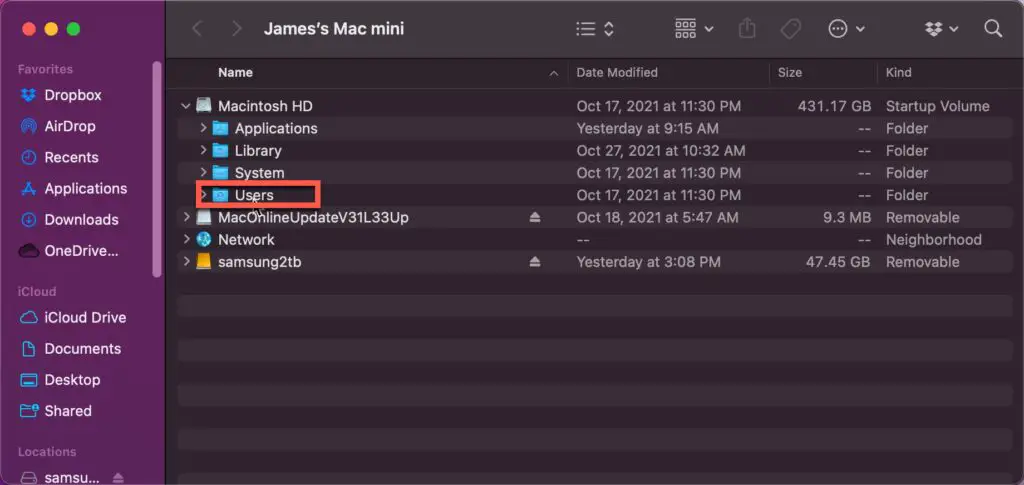
- Open the “Users” folder
- Open your user folder and then the “Movies” folder as shown below
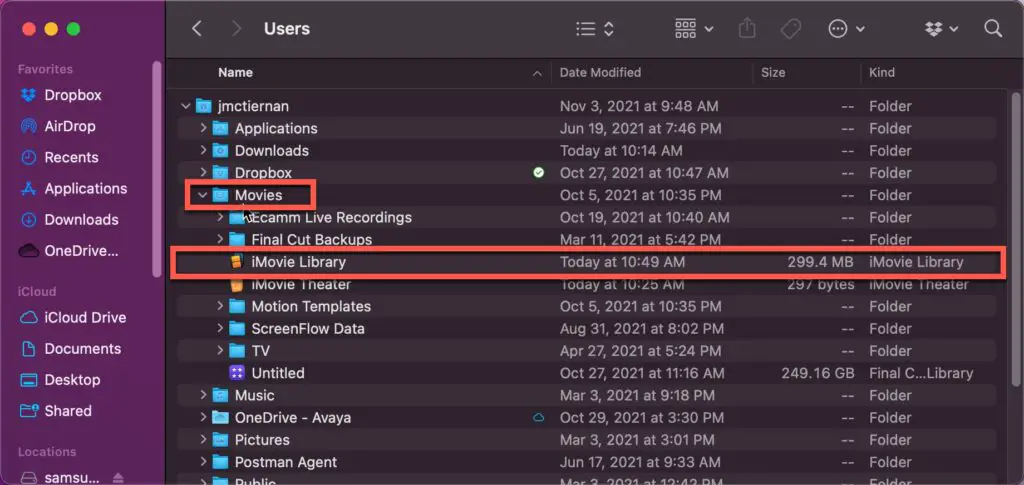
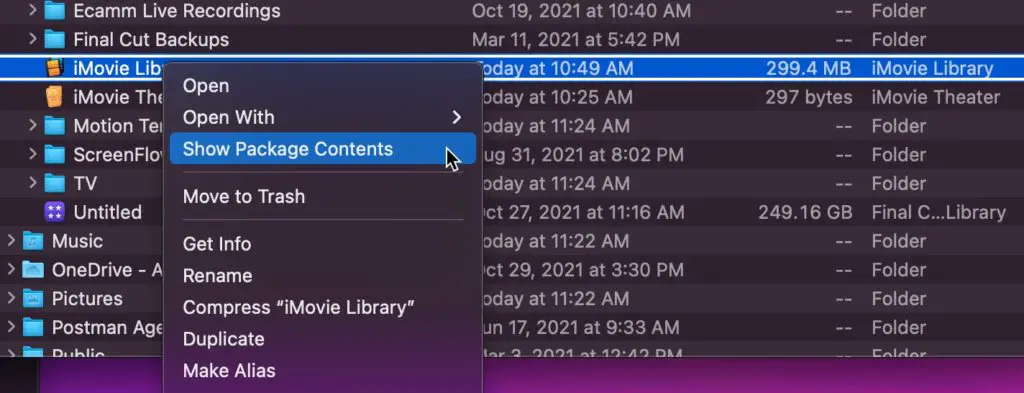
- You should see your iMovie Library file. Right-click on it and select “Show Package Contents” for the available options
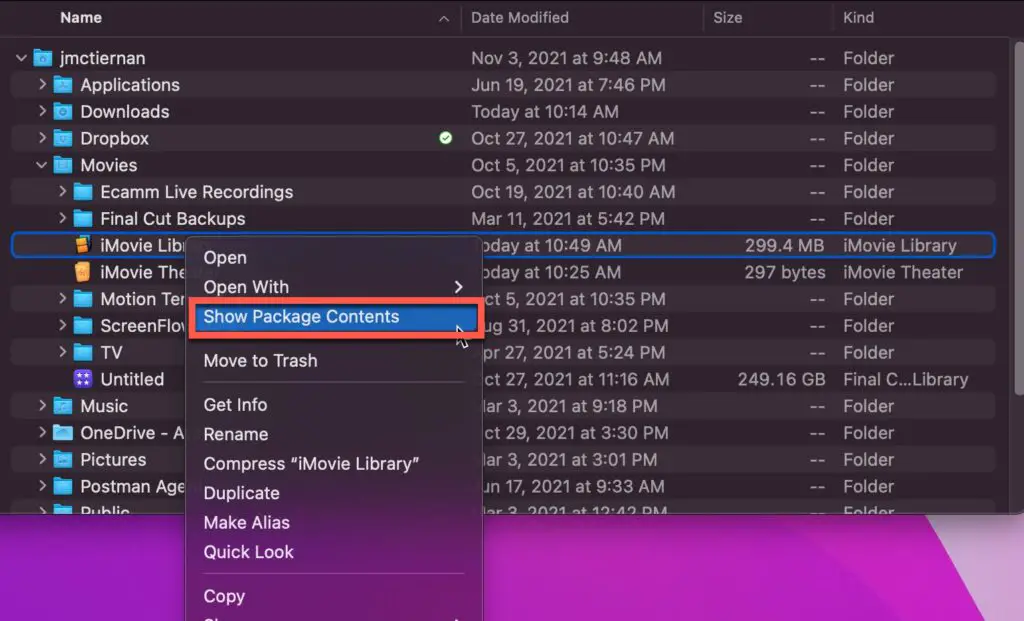
- The contents of your iMovie Library file will appear
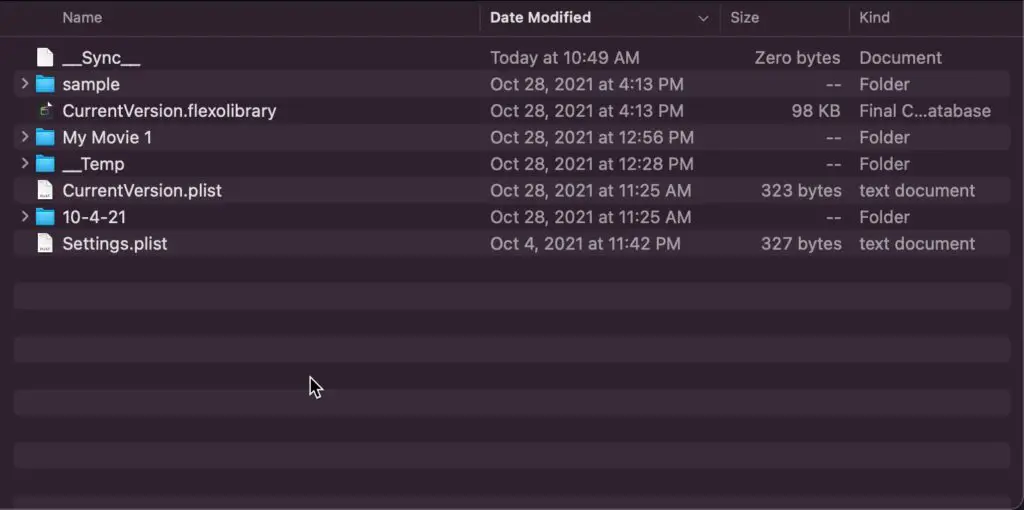
As you can see, there are projects and settings files within the iMovie Library file.
To understand why your iMovie library is so large, we need to first understand what it contains. The most significant part of your library will be your projects. This includes the video, audio, and images from each of your movies. Every time that you adjust the project, it will be automatically saved.
You’ll also have any renders that iMovie has created. If you were using a previous version of iMovie, it will have the files it created before you upgraded.
If you are looking for a comparison of iMovie for Mac and iMovie for iPad, check out our iMovie for iPad vs iMovie for Mac Guide.
How to Reduce iMovie Library Size?
The best option is to delete any unused project files. You can also save a lot of space by deleting any renders you have created.
If you notice that your library is taking up a lot of space, you’ll need to prune it back a bit. When doing this, you’ll have to be careful. You don’t want to accidentally delete any important files. Because of this, you will need to follow these steps:
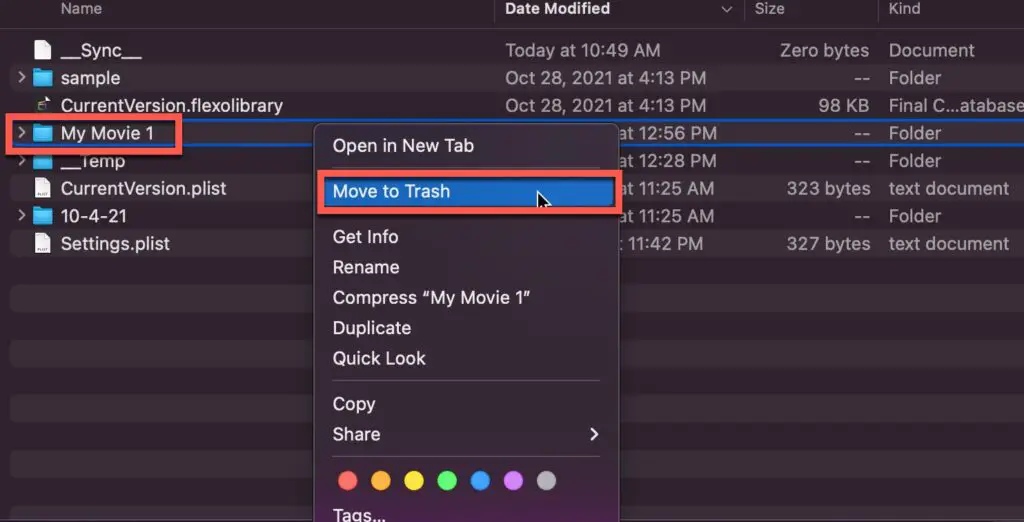
- Open Finder and navigate to Macintosh HD -> Users -> [YOUR USER] -> Movies
- Right-Click on the iMovie Library file and select “Show Package Contents“
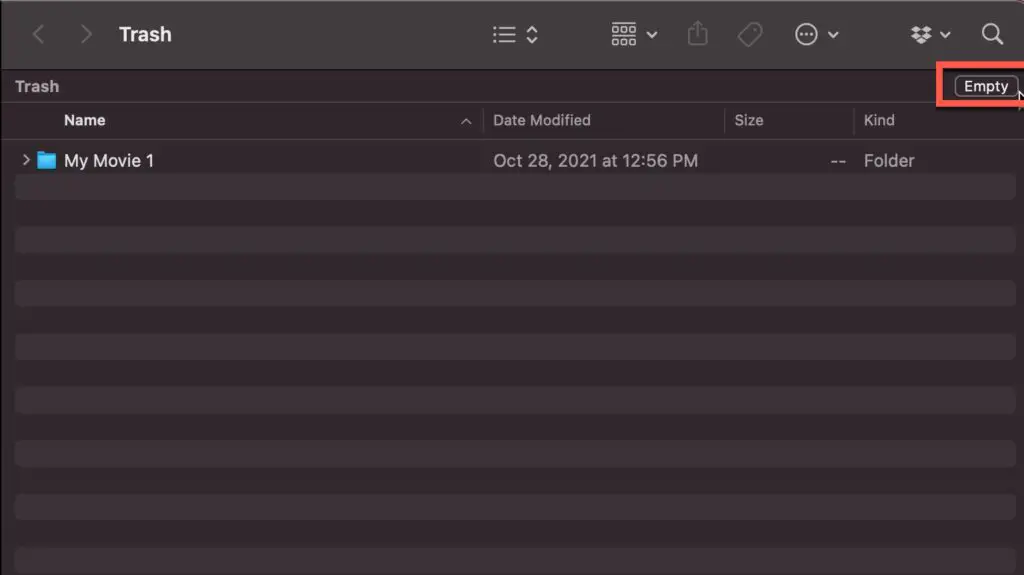
- Right-Click on the iMovie project folder you want to delete and select “Move to Trash“
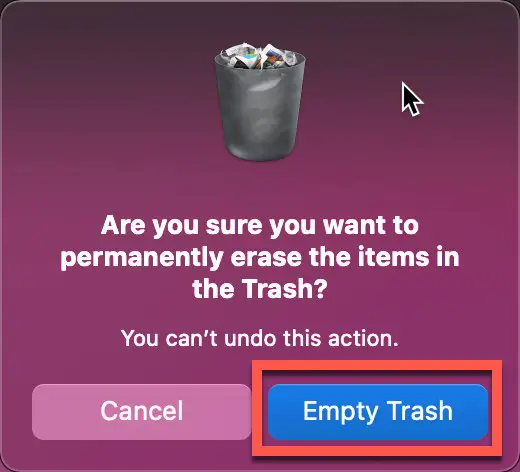
- Double-click on the trash can and click the “Empty” button
- Click “Empty Trash” to confirm the deleting of the file(s) from your Mac
You will also need to get rid of the file renders, which can take up a lot of space on your computer.
Use the steps described earlier in the “Need to Delete Render Files” section to delete your render files.
It should be noted that if you ever decide you want to export the movie, you will need to create a render from scratch. This might take a little longer, but it ensures that your computer isn’t getting clogged up with useless renders.
How to Change iMovie Library
Sometimes, you will have multiple libraries. Because of this, you will need the ability to change where your project is being saved to. Thankfully, this is a fairly easy process. Here are the steps to follow to change your library in iMovie:
- Before you do this, make sure that you can access both library locations from your computer.

Open up iMovie. You should see your projects screen as shown in the screenshot above.
- Go to “File -> Open Library -> Other
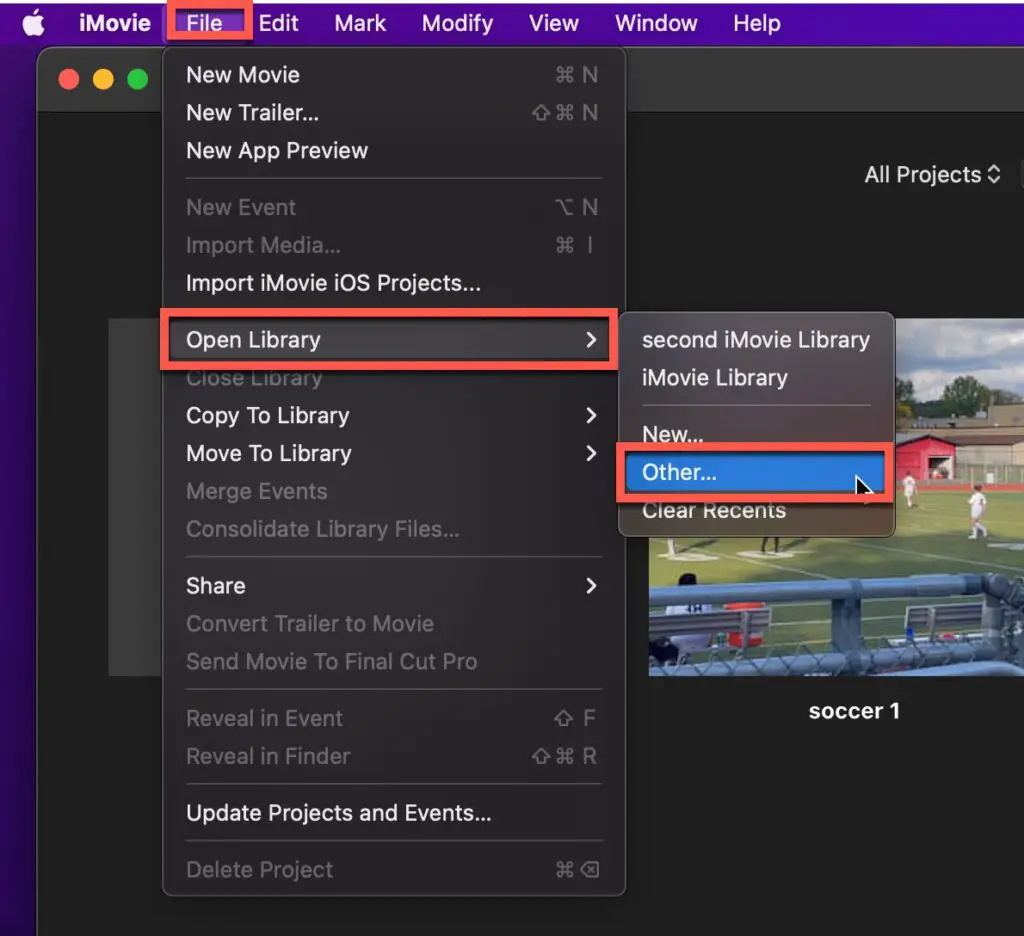
Next, in the main menu, go to “File -> Open Library -> Other…”
- Select the Library you want to use and click the “Choose” button
- If you library isn’t showing, click the “Locate” button
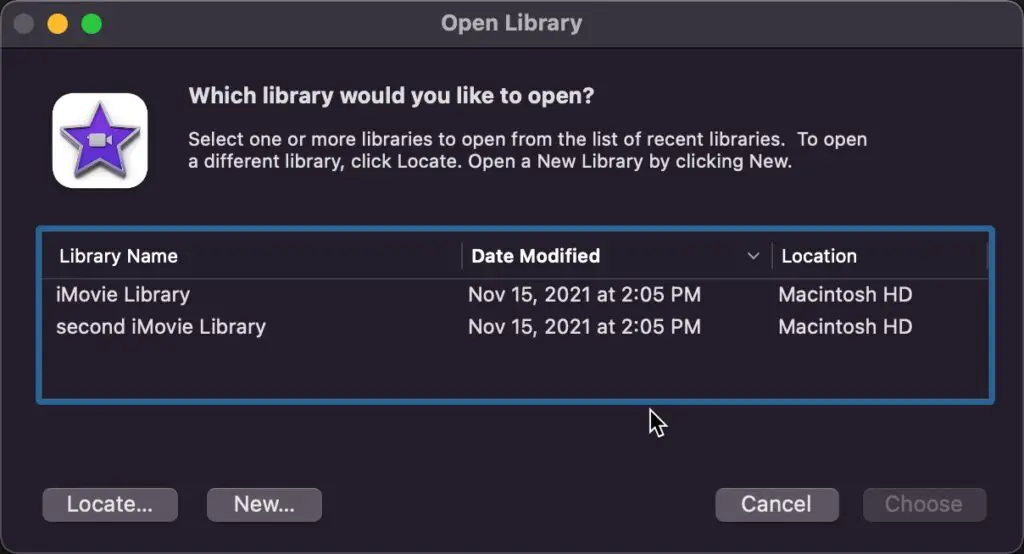
The “Open Library” dialog box will appear as shown above. All the libraries that iMovie knows about will be listed. Click on the one you want to save to and click the “Choose” button.
If the library you want to use is not listed, click the “Locate…” button and navigate to the folder that contains the library. Select it by clicking it and then click the “Open” button.
If you need to fix overexposed video in iMovie then you must read our Guide to Fixing Overexposed Video in iMovie.
How to Create an iMovie Library
Sometimes, you will want to change the location to which you are saving your movies. One of the most common mistakes to avoid when doing this is changing the name of the folder. If you do this, iMovie won’t know where to save the new files.
The best option is to create a new library. This is a good way of creating some separation between your projects or setting yourself up to work on multiple devices. Here is how you can create a new library in iMovie:
- Open the iMovie app

Open up iMovie on your Mac.
- In the main menu, go to “File -> Open Library -> New”
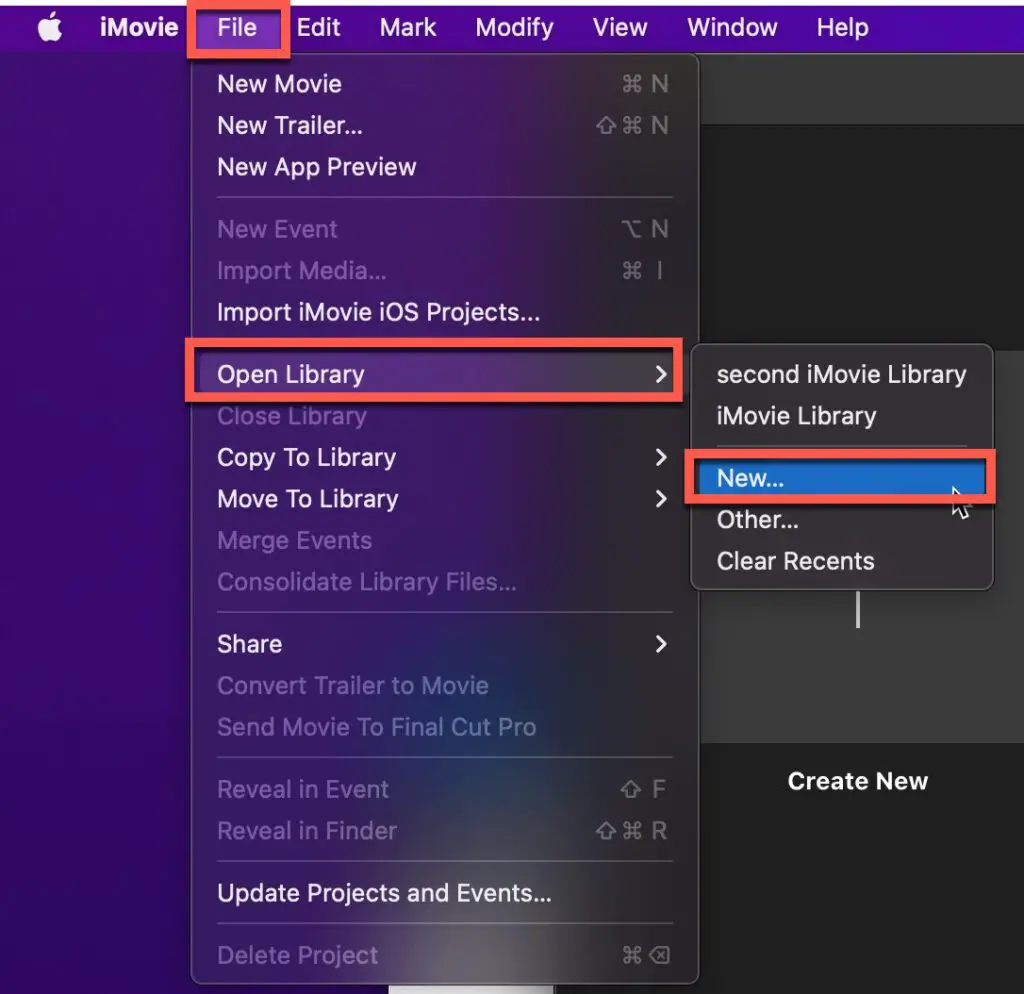
Next, in the iMovie main menu, go to “File -> Open Library -> New…” as shown in the screenshot above.
- Pick the location where you want to save the library and choose what name you want to give to the library
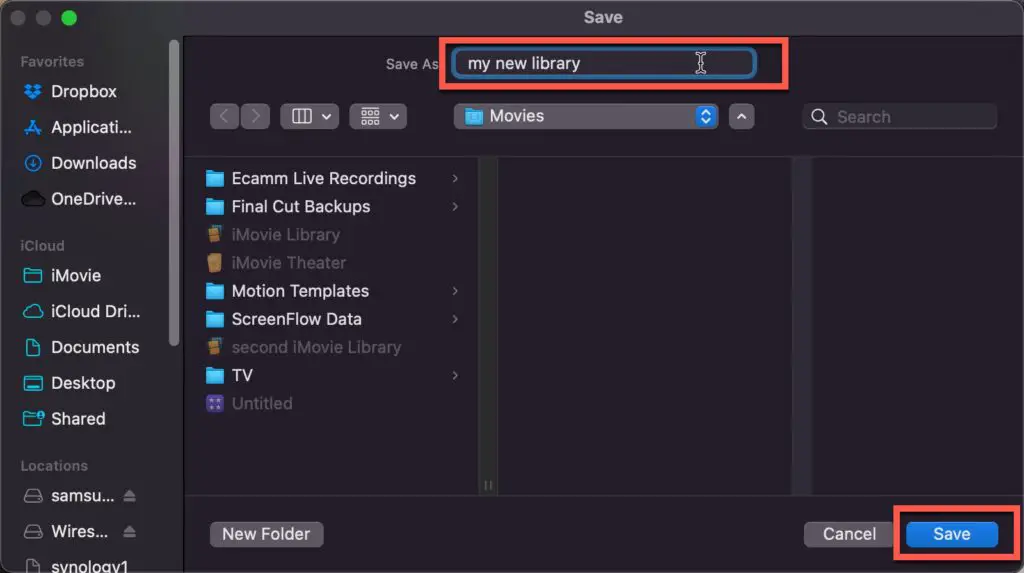
You should now see the Save dialog box as shown above. Navigate to the folder where you want to save your new iMovie library and give your library a name.
- When you are happy, click the “Save” button
Once you have everything set, click the “Save” button to save your new library.
Want to learn how to use and layer multiple audio tracks in iMovie? You need to read our Ultimate Guide to Working with Multiple Audio Tracks in iMovie.
How to Backup iMovie Library
Editing a movie will be a very tricky process. It will take a lot of time and effort. The last thing you want is for this hard work to be lost because of a computer glitch. The best way to make sure that this doesn’t happy is by creating an external copy of your library. Here’s how you can copy your iMovie library:
- Go to Finder and select the Movies folder
Navigate to the Movies folder but opening Finder and selecting the Home folder. You should see the Movies folder as shown above.
- Right-click on the iMovie Library and select the “Copy” option
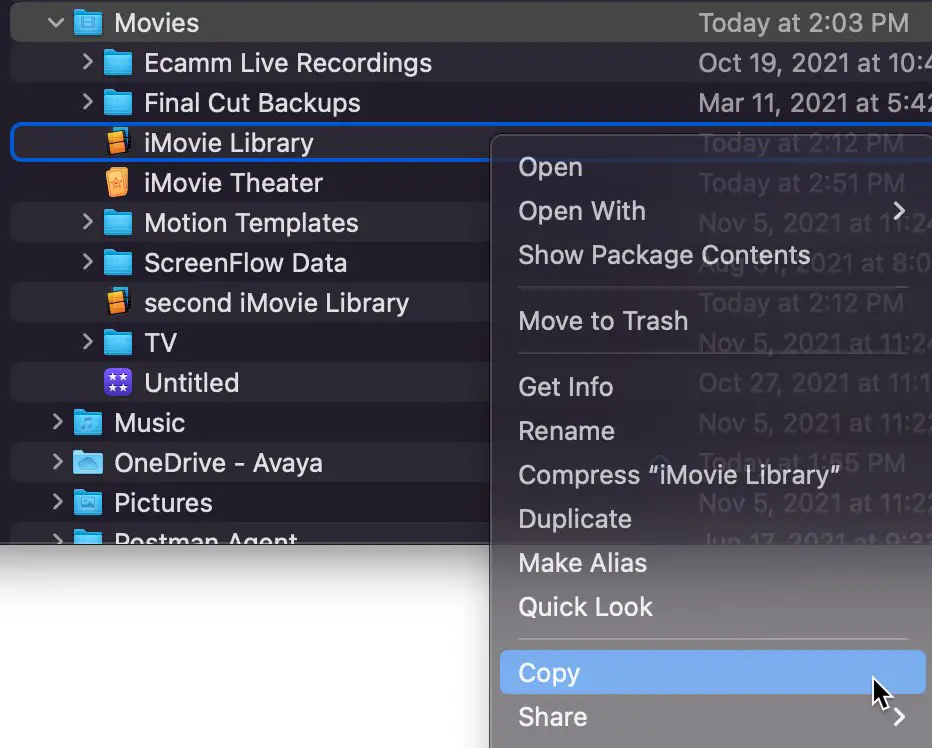
Locate the “iMovie Library” and right-click on it. Select “Copy” from the menu to copy the iMovie Library.
- Navigate to a different folder or drive and paste into the folder
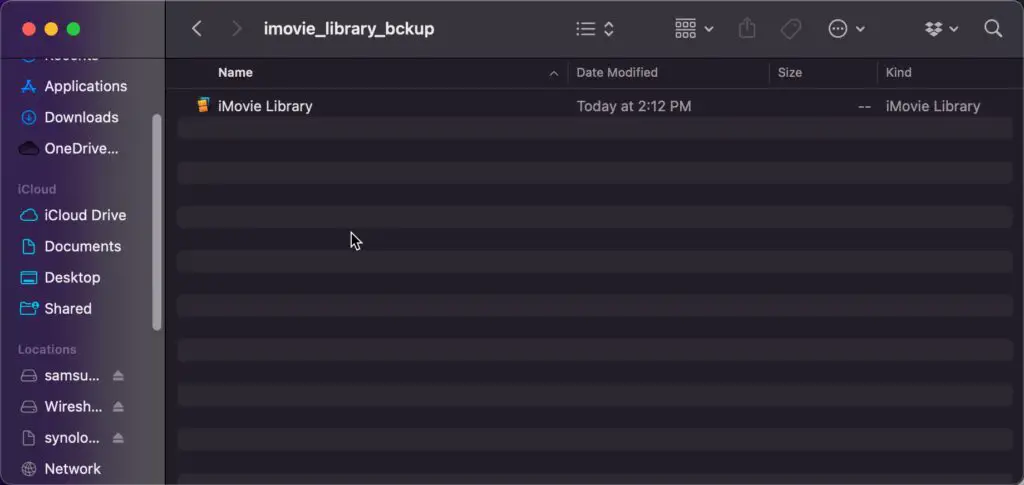
Navigate to the folder or drive where you want to backup your iMovie Library. I recommend using a different drive for this.
Once you are in the folder, paste the iMovie Library into the folder by pressing Command – V on your keyboard.
- Open the library, to check that it is working properly.
Looking to transfer or share your iMovie projects? Check out our Complete Guide to Transferring and Sharing iMovie Projects.
Final Thoughts
iMovie can be a powerful tool that you can use to edit videos. However, you’ll need to make sure that you are managing your libraries properly. This will ensure that you know where all your files are and that your projects aren’t taking up too much space on your computer. Hopefully, these tips will allow you to do this.
Sources
https://support.apple.com/en-us/HT203049
https://macpaw.com/how-to/clear-imovie-library
https://www.picbackman.com/tips-tricks/how-to-move-imovie-library-to-a-new-location/
