
High-quality movie-making has never been easier with the sophisticated cameras on Apple’s latest iPhones. And powerful apps like iMovie enables just about anyone to transform video into cinematic magic.
In this detailed guide, we review step-by-step how to share and transfer iMovie projects, so keep reading to learn more about these amazing processes.
Before we get started, if you want to learn how to change the voice pitch of a video clip in iMovie, check out our Complete Guide to Changing Voice Pitch in iMovie.
How to Export a Project in iMovie for MacOS
- Open up iMovie and click on the project you want to export
- Click the Share button
- Select Export File from the available options
- Give your video a name by double-clicking the title and typing in your title
- Configure the export settings for your video and click the Next… button
- In the File Explorer, navigate to the folder where you want to export the video to and then click the Save button
- Your video will start exporting to the folder and will notify you once the export is complete
Open Up iMovie And Click On The Project You Want to Export

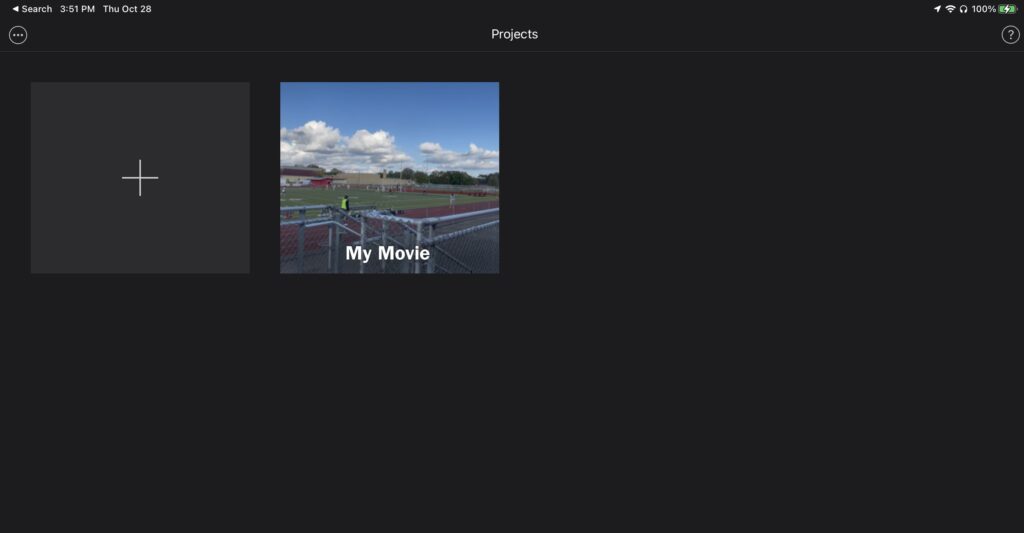
Open up iMovie. You should see a screen like the one above showing you all of your iMovie projects. Click on the iMovie project that you want to export.
Click on the Share Button
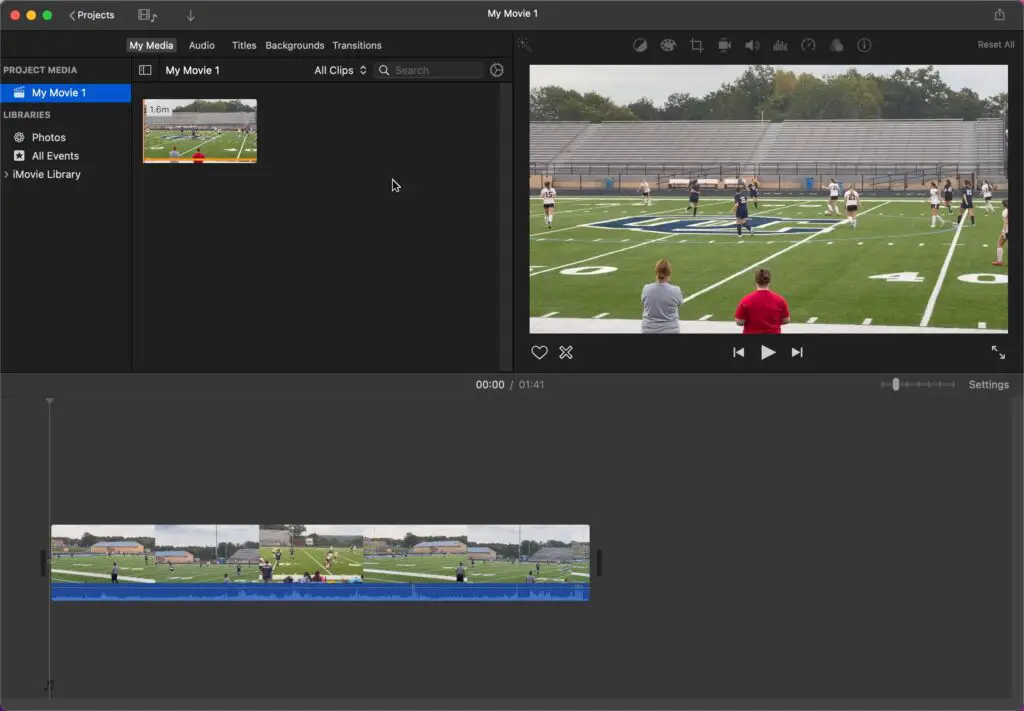
You should now see iMovie opened up to your project like the screenshot above.
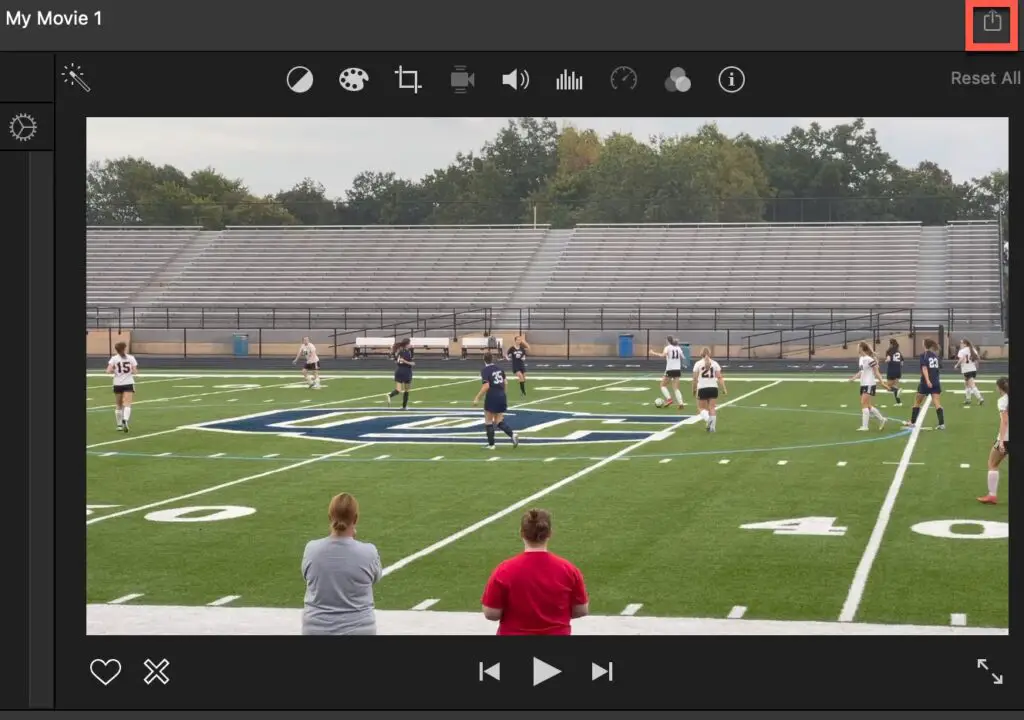
Click on the Share button in the upper-right-hand corner of the iMovie project as shown in the screenshot above. This will bring up the project export options for iMovie.
Select Export File From The Available Options
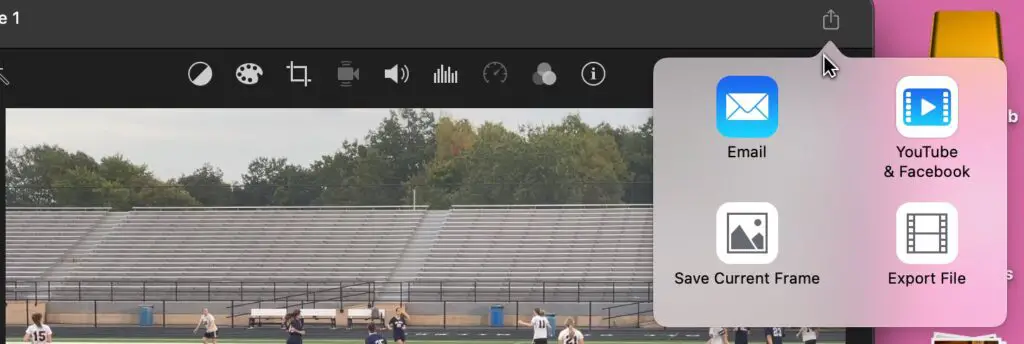
iMovie for MacOS has four export options:
- YouTube & Facebook
- Save Current Frame
- Export File
I generally recommend using the Export File option and it is the most versatile in my opinion.
Click on the Export File option from the options.
Give Your Video A Title
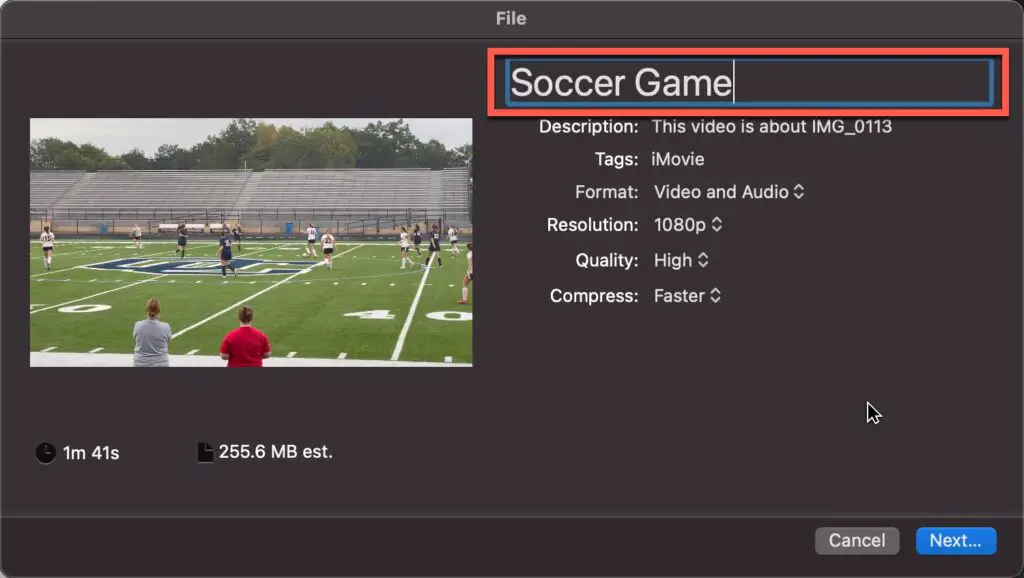
You should now see the File dialog box as shown above. Double-click the Title and type in the title you want your video to have. Hit the Enter key to exit edit mode for the text box.
Configure The Video Export Settings and Click The Next Button
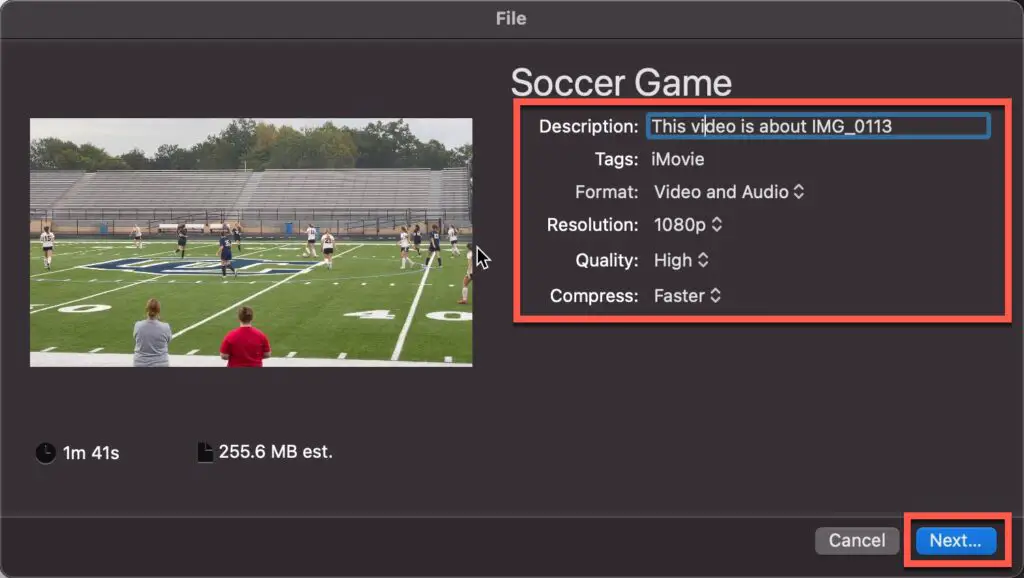
After editing the title, there are several options for your exported video that you can configure:
- Description
- Tags
- Format
- Resolution
- Quality
- Compress
I generally just leave the defaults for the settings. Configure the settings and, once done, click the Next… button to continue the export process.
Select A Folder And Click The Save Button
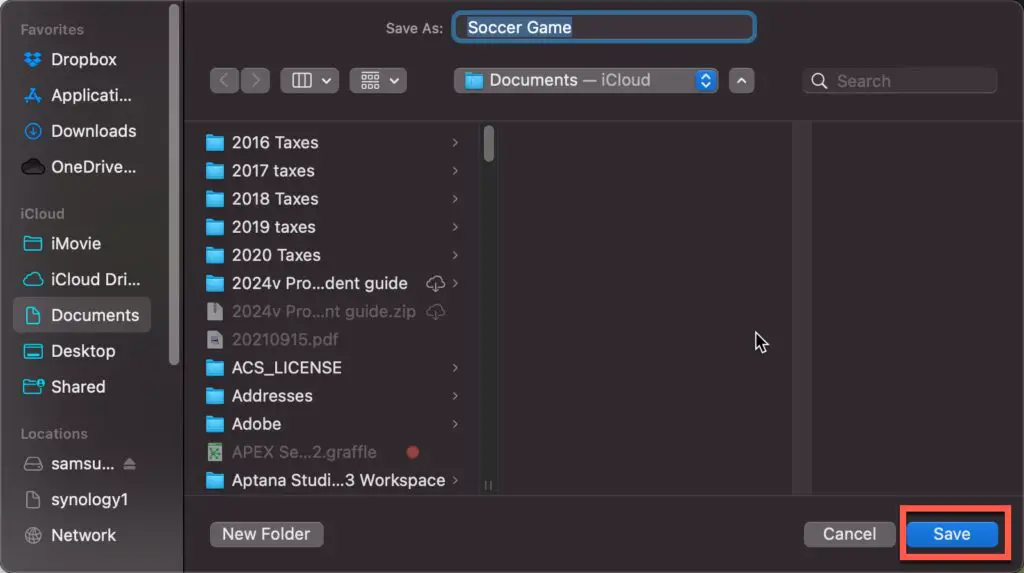
You should now see the File Explorer as shown in the screenshot above. Navigate to the folder where you want to export the video. Click the Save button to start the process of iMovie exporting your project as a video file.
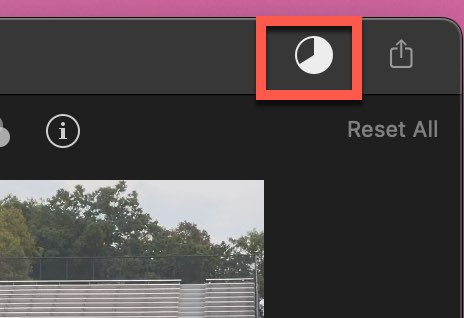
Your video will start exporting. iMovie provides a progress indicator in the upper-right corner of the iMovie project window as shown in the screenshot above.

Once iMovie has finished exporting your video, you should see a confirmation notification as shown above (assuming you don’t have notifications turned off).
Your video should now be ready.
If you are looking for a comparison of iMovie for Mac and iMovie for iPad, check out our iMovie for iPad vs iMovie for Mac Guide.
There is an amazing iMovie course, The Complete Guide to iMovie from Beginner to Expert that I recommend you check out.
How to Export an iMovie Project in iMovie for iPhone and iPad
When it comes to exporting an iMovie project, there are essentially four paths that can be taken (email, message, AirDrop, or cloud), but they all begin the same way.
These are the steps to export an iMovie project:
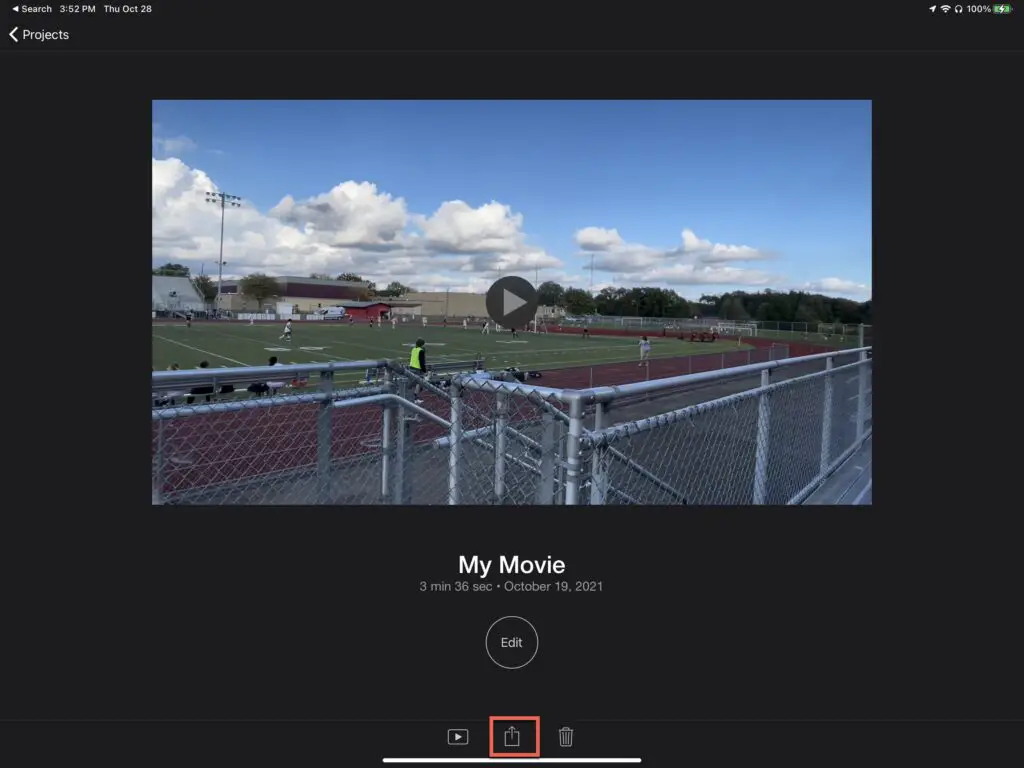
- From the Projects browser page in the iMovie app, select the particular iMovie project that you want to export
Open up iMovie on your iOS device (iPhone or iPad). For our demonstration here, we will use an iPad but all of these instructions are the same for iPhone as well.
Select the project you want to export by pressing on it.
- A separate page for the selected iMovie project will then open. Press the Share button to see your export options.
Once you press on the project you want to export in the project page, you
- Tapping the share button will open up a menu containing multiple options for exporting your iMovie project, including:
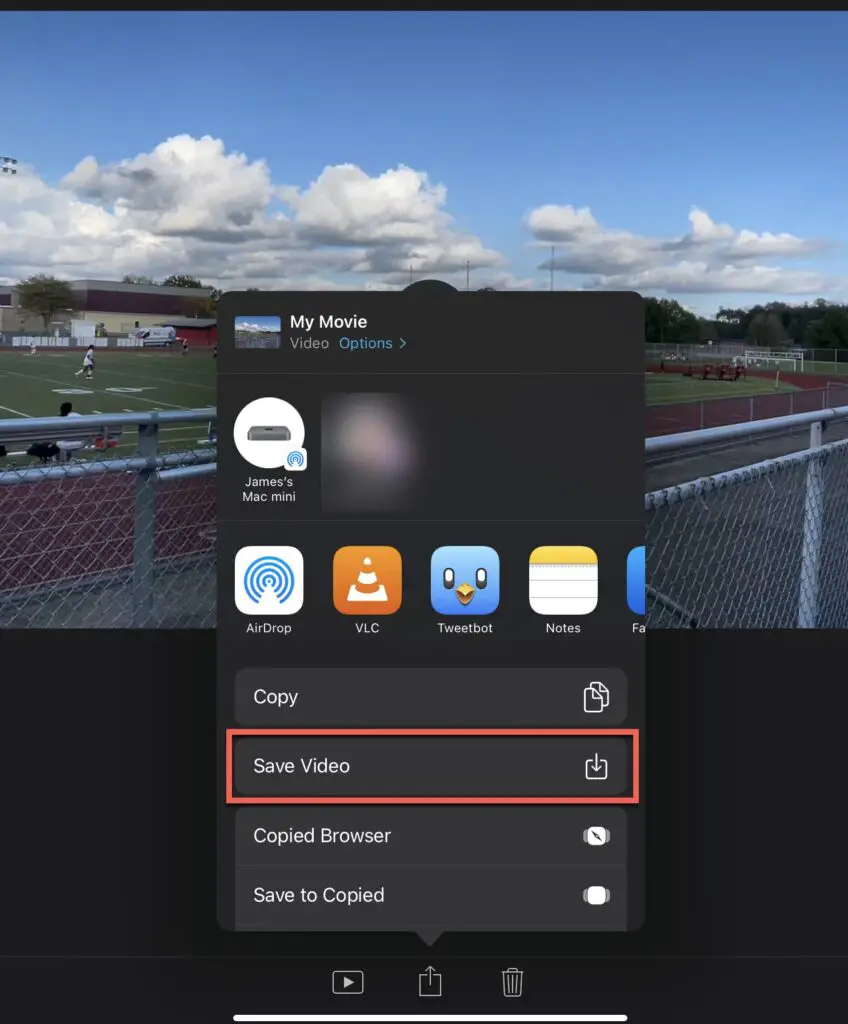
- Text message
- AirDrop
- Cloud (web-based storage)
- Sharing the video to various other applications on your iOS device
If you are looking to save the video to your iOS device, choose the Save Video option as shown in the screenshot above.
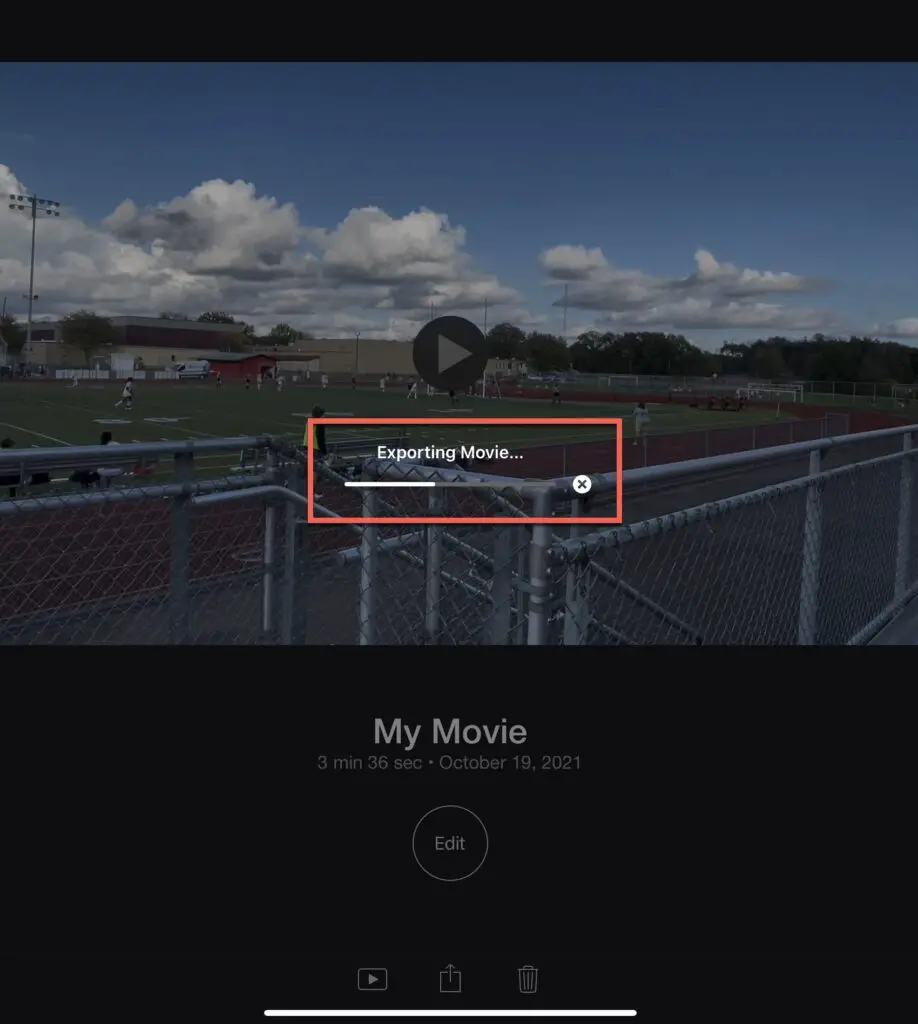
- iMovie will begin to export your video
Since the iMovie project that is being exported is essentially a file, its size can determine whether it can be exported (i.e., the longer the video, the larger the file size, and the more difficult it may be to export).
If the file is too large to export, tap “Options” next to the project’s name and choose a lower resolution
Once an iMovie project has been successfully exported, it can then be viewed or edited from other devices.
A quick note, if you are looking to fix overexposed video in iMovie, you must check out our Guide to Fixing Overexposed Video in iMovie.
How to Share an iMovie Project Across Devices
Sharing an iMovie project across devices is not only a way to enable others to view your video, but it also provides access to your project for team collaboration.
Here are the steps you will need to follow:
To Share an iMovie Project via AirDrop:
- Select your project from the Projects browser in iMovie
- Tap the “Share” button
- Select the “AirDrop” option
- Tap the device you want to share your project with
To Share an iMovie Project Using a Shared Album:
- Having selected your project and accessed the Share menu, select the “Add to Shared Album” option
- Type the name of this iMovie project as you want it to appear in the designated shared album
- If you have more than one shared album, select the one you want this iMovie project to be shared with (you can also create a new shared album during this step)
- Tap “Post” to share
To Share an iMovie Project by Saving to a Photo Album:
- Having selected your project and accessed the Share menu, select the “Save Video” option
- The video will be added to your library
- You can now access the iMovie project from any computer that you connect your device to (or any device that is synced with your photo library)
To Share an iMovie Project by Saving to iCloud Drive:
- Having selected your project and accessed the Share menu, select the “Save to Files” option
- You can now select the desired destination such as your iCloud drive (you can also select other cloud storage options such as Google Drive during this step)
- Tap “Save” to save your iMovie project
Looking to use music in your iMovie projects? Our Ultimate Guide to Using Music in iMovie will teach you everything you need to know to add and layer music and audio files in iMovie like a boss!
How Do I Transfer iMovie from iPhone to Mac
There may be instances when you need to transfer an iMovie project from an iPhone to a Mac.
These are the steps you need to take:
- Connect the device containing the iMovie project to your Mac using the appropriate USB cable
- From the iMovie app, click on the “Import” button (it is a square with a down arrow) on the toolbar (alternatively, the Import button can also be found using the “Media” button)
- Locate your connected device and then select the desired clip from the displayed list of media files (thumbnails of each video and photo in the library will be shown)
- At the top of the Import window will be an “Import to:” box with a drop-down menu where you can either:
- Save the imported file to an existing event
- Create a new event and type in the name of the newly imported file
- You will then be given the option to import all clips or import selected clips
By transferring an iMovie project from an iPhone to a Mac, it can be viewed or edited from the larger, more powerful desktop.
How to Edit an iMovie Project Across Devices
There may be an instance where multiple people (e.g., a team project or a collaborative effort) need to edit the same iMovie project on their own, separate devices. While this can be done, it is a challenging process that requires close coordination between the parties.
Here are the steps:
- Both devices must be operating with the exact same version of iMovie
- Both devices must have access to the exact same library containing the iMovie project clips and files (for this reason, it may be advisable to create a new library for this specific purpose)
- Only one device can edit the same iMovie project at a time, and it must be updated (saved) to the same location every time
- Each party should notify the other when their editing work is completed and saved so that the other can then work on the same file
- There are specific steps that can be taken to ensure that the library setup is done correctly, and these procedures can be found here
Do you want to learn how to loop videos in iMovie? Check out our How to Loop Video in iMovie tutorial to learn how to loop video quickly and easily
How To Send An iMovie That Is Too Big
Depending on the length and resolution, an iMovie project file size can become too big to send through conventional means. Fortunately, there are ways to reduce file sizes so that an iMovie can be sent, and these steps can be done through the iMovie app on either a Mac or an iPhone.
Here’s how:
Reducing an iMovie Size on a Mac
- From the Share menu in the iMovie app, select “File”
- The pop-up window displays the project’s length and estimated file size
- Using the up and down arrows next to “Resolution” will affect the video’s file size (e.g., the better/higher the resolution, the larger the file)
- Using the up and down arrows next to “Quality” will have a similar effect
- Adjust either or both parameters until you achieve a file size that will enable you to send the iMovie
Reducing an iMovie Size on an iPhone
- Following the same steps as for exporting an iMovie project from an iPhone, navigate to the “Options” window for the project that is being sent
- Among the available options will be “Resolution,” and some of the choices include:
- 360p
- 540p
- 720p HD
- 1080p HD
- The two HD options (720p and 1080p) represent the best viewing quality but also correspond to the largest file sizes (thus, choosing a lower resolution will enable a large file to be sent)
Conclusion
An Apple iPhone and the iMovie app are a powerful combination for creating film projects. Hopefully, this detailed guide will assist you in sharing and transferring your next iMovie project.
SOURCES
https://support.apple.com/en-us/HT212142
https://support.apple.com/guide/imovie-iphone/import-imovie-projects-knad6f4c9b6e/2.3/ios/15.0
https://support.apple.com/guide/imovie-iphone/share-to-other-devices-kna4501dba9/ios
https://support.apple.com/guide/imovie/import-from-iphone-or-ipad-mov142f39686/10.2.4/mac/10.15.6
https://discussions.apple.com/thread/7440497
http://help.apple.com/imovie/mac/10.1/#/mov882dee351
https://learn.solent.ac.uk/mod/book/view.php?id=370077&chapterid=163824
