
Final Cut Pro is one of the most popular video editing software amongst Mac users. One of the things that can be frustrating when editing video is how to deal with glitchy
This blog post will teach you how to fix glitchy videos in Final Cut Pro. We will share some of the best tips and tricks to resolve video glitches and avoid them as well.
If you are looking to master Final Cut Pro or any other applications in the video editing space, I highly recommend that you check out SkillShare. SkillShare offers a ton of great courses you can take for one low monthly fee.

I personally recommend Ali Abdaal’s Video Editing with Final Cut Pro X course. Ali does a great job of layering in each concept in a very easy-to-learn way that will have you becoming a Final Cut Pro ninja in no time.
So, let’s begin!
How to Fix a Glitchy Video in Final Cut Pro?
Create Optimized Media
If you are experiencing stuttery, glitchy, or choppy video in Final Cut Pro, the first thing to do is to create optimized media.
The Optimized Media setting in Final Cut Pro transcodes your existing video clip to the Apple ProRes 422 format. Why do this? Because Apple engineered this format to:
- increase performance while editing
- provide faster rendering times
To create optimized media in Final Cut Pro, do the following:
- Select the video clip in your project timeline you want to optimize
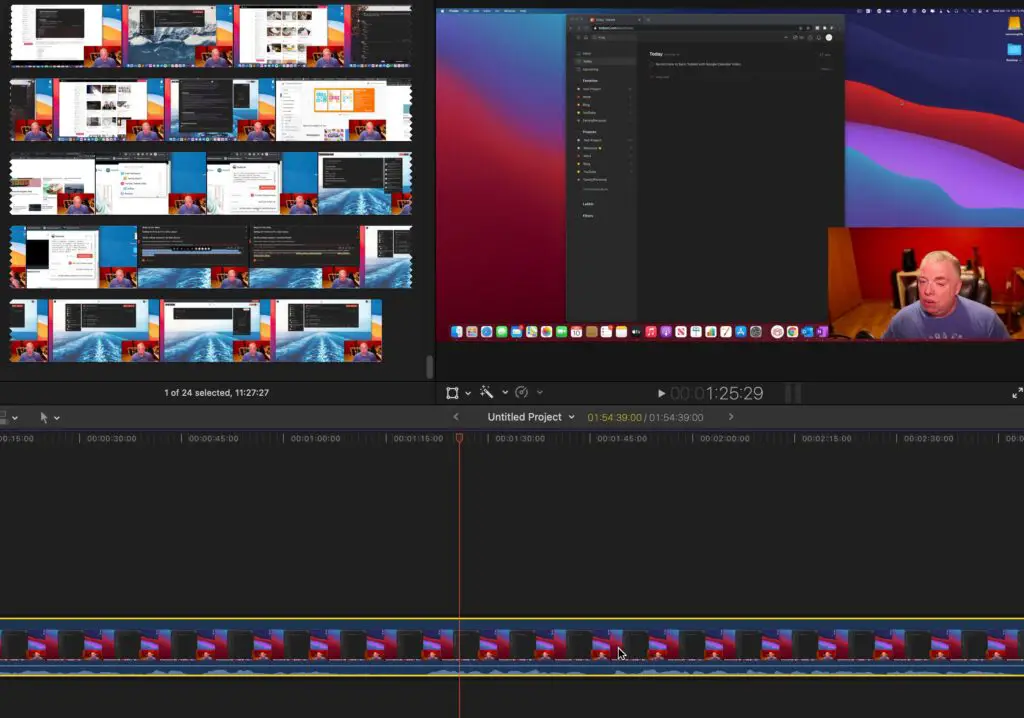
In your project timeline, click on the video clip you want to optimize.
- In the upper right hand corner of the Final Cut Pro window, click on the “Info Inspector” button
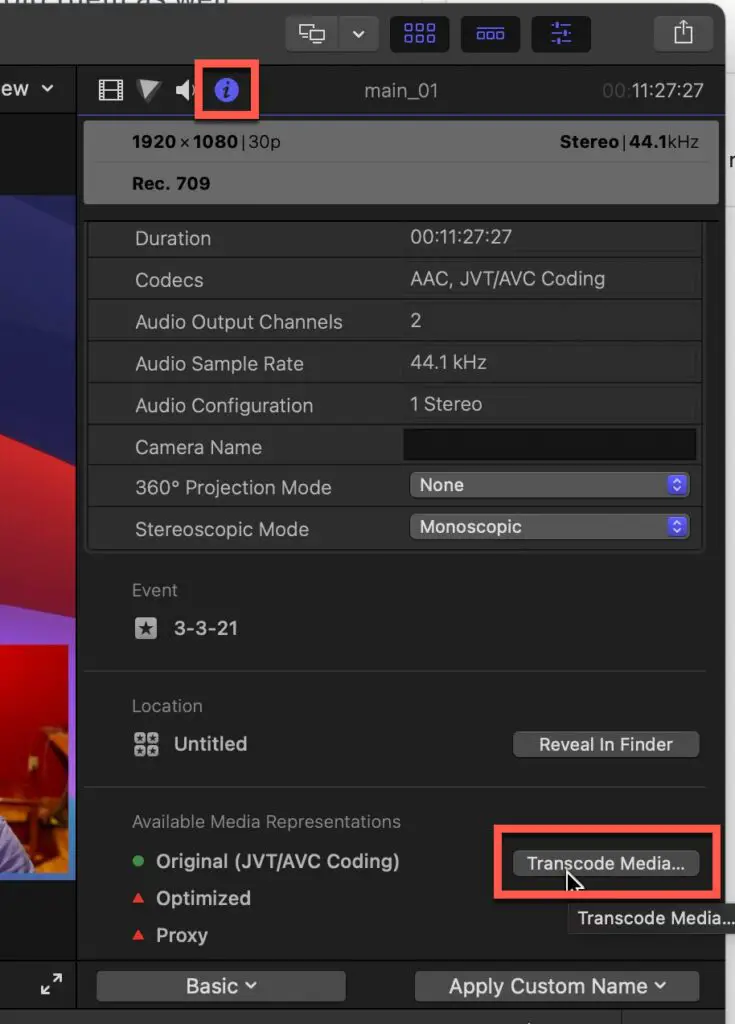
Next, we need to navigate to the info inspector. Click in the “i” icon to bring up the info inspector as shown in the screenshot above.
- Click on the “Transcode Media…” button
- Check the “Create optimized media” checkbox and click the “Ok” button
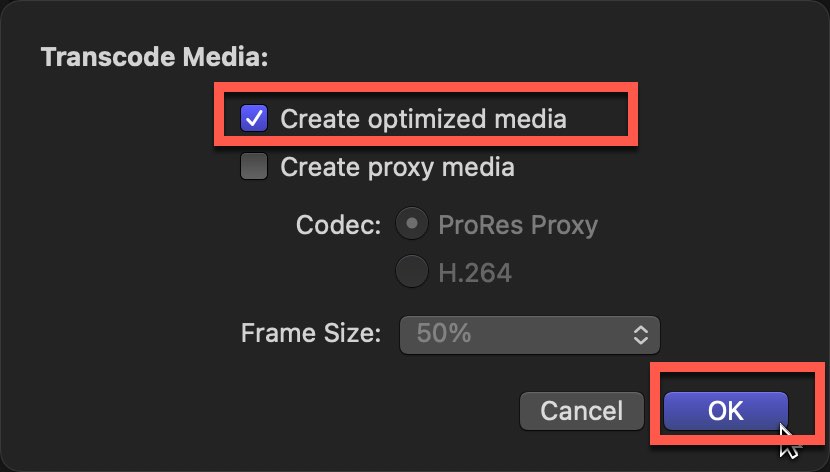
Next, you need to check the checkbox marked “Create optimized media”. This will tell Final Cut Pro that you want to generate and work with an optimized media file.
- Allow Final Cut Pro to render the optimized version of your video clip
Final Cut Pro will now start rendering the optimized version of your video file. You should see a video performance improvement when using the optimized version of your video clip.
If you are using iMovie and need to fix glitchy or choppy video, check out our complete guide to fixing glitchy video in iMovie.
Change Video Quality to Optical Flow
For slow-motion footage, the first thing I do when I have choppy or glitchy-looking videos is to change the video quality to optical flow.
Optical flow inserts additional frames between the existing frames of your video clip. The way it does this is by using an algorithm that determines the movement of pixels. It then draws the new frame based on the analysis the algorithm performs (source).
In plain English, Final Cut analyzes the differences between neighboring frames and “draws” a new frame(s) in between to smooth out playback.
To enable optical flow for a video clip in Final Cut Pro, do the following:
- Select the Clip that is glitchy or choppy
Open up Final Cut Pro and open the project containing the glitchy video file. Select the glitchy file by clicking on it.
2. In the Video inspector, enable “Rolling Shutter” option
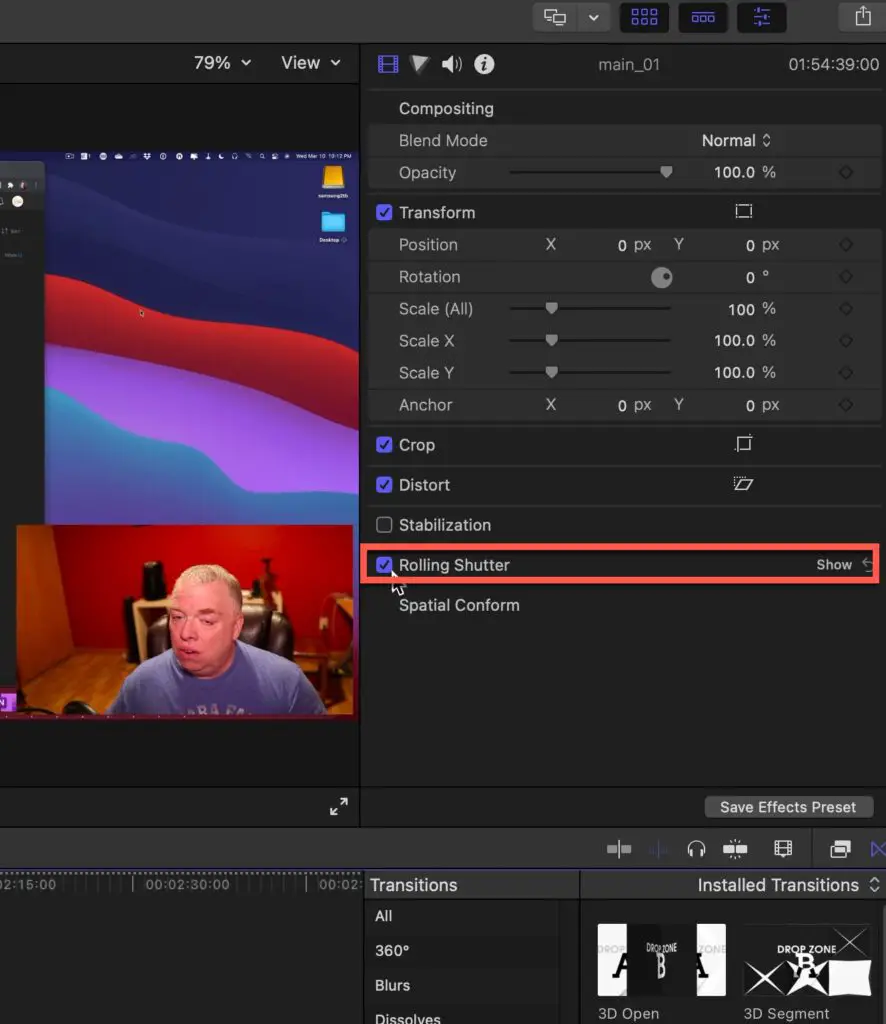
In the Video inspector, enable “Rolling Shutter” by clicking on the empty checkbox.
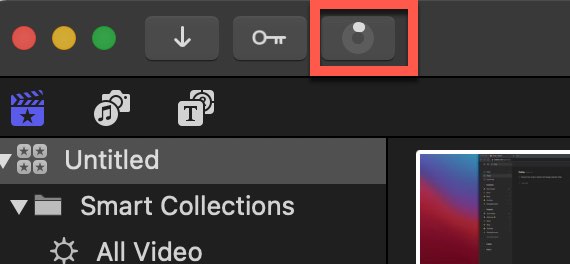
- Click on the “odometer” button underneath the video preview and select Video Quality -> Optical Flow from the menu.
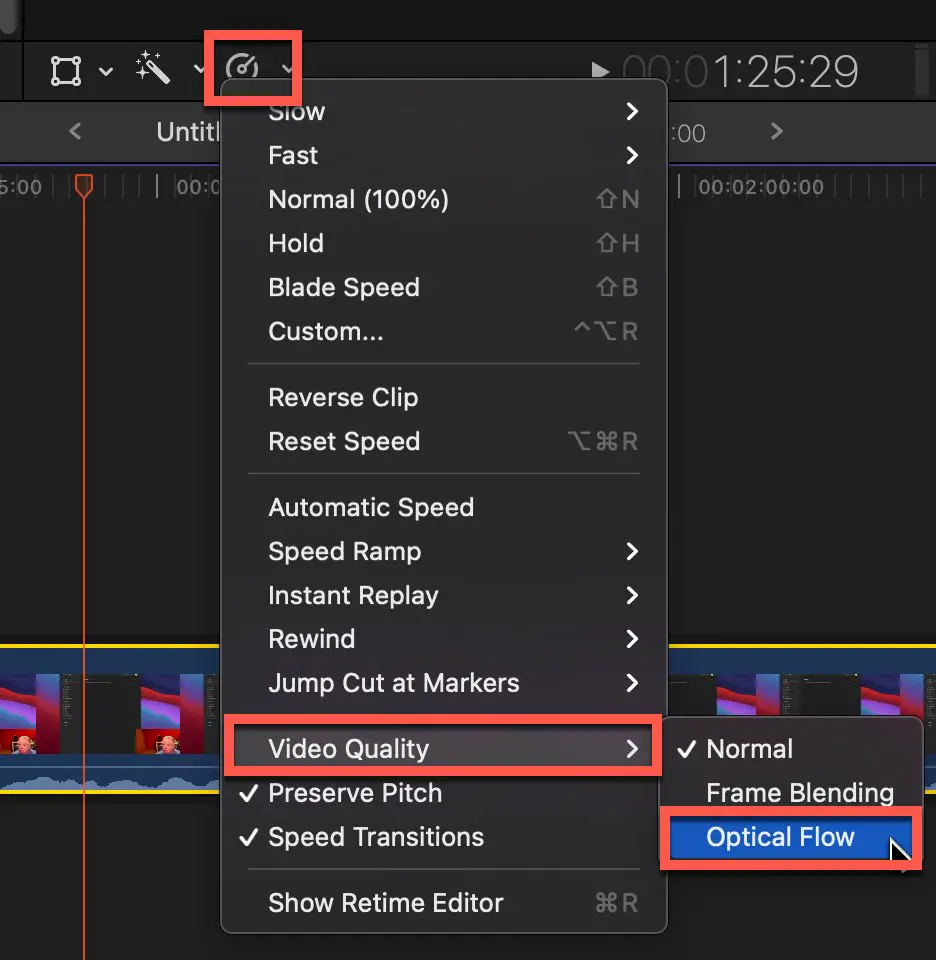
Next, click on the “Odometer” button as shown in the screenshot above. Navigate to Video Quality -> Optical Flow and click on it to select it.
- Wait until Final Cut Pro finishes rendering video clip
Once you select Optical Flow, Final Cut Pro will render the video clip. Wait until the rendering is complete.
Are you working on a project in iMovie and have an overexposed video you need to fix? Check out our complete guide to fixing overexposed videos in iMovie for both Mac and iOS.
Replacing the Glitchy/Corrupted Frame
Sometimes a specific frame or frames of the video clip gets corrupted for whatever reason when importing it into Final Cut Pro. Fortunately, if you still have the original clip, you can replace the frame(s) in question.
This will give you a clean, nice, and glitch-free clip. Follow these steps to do that. And make sure to note the frame number before replacing, so that you can easily find and reload it later.
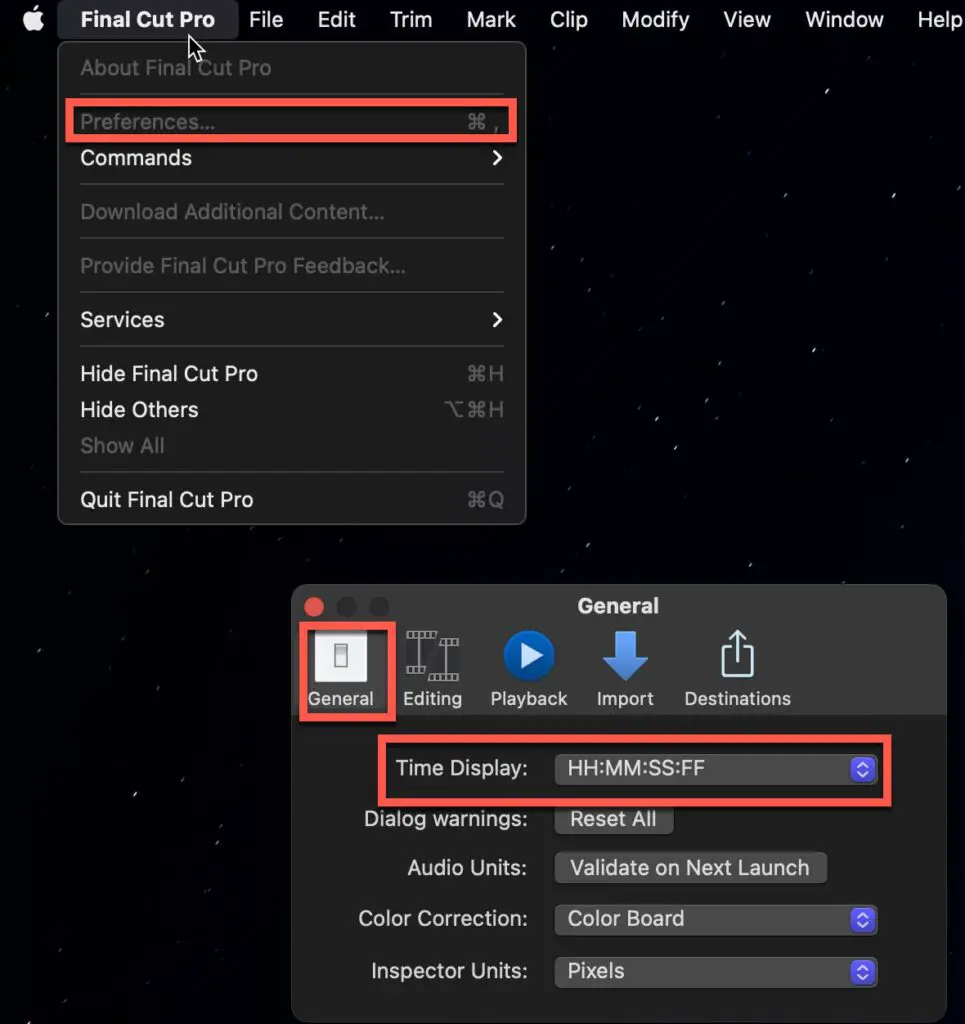
- On the top menu, click Final Cut Pro > Preferences > General > Time Display.
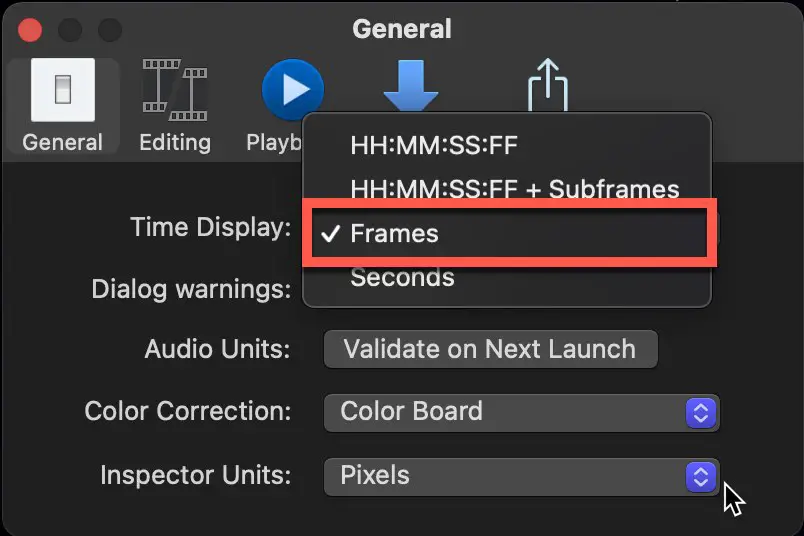
Now, set this to “Frames.” This will allow you to find the specific frame that contains the glitches.
- Go to the timeline and scroll forward until you find the corrupted frame/clip.
- When you locate the glitchy clip, copy all the effects you have applied to it by clicking Command+C.
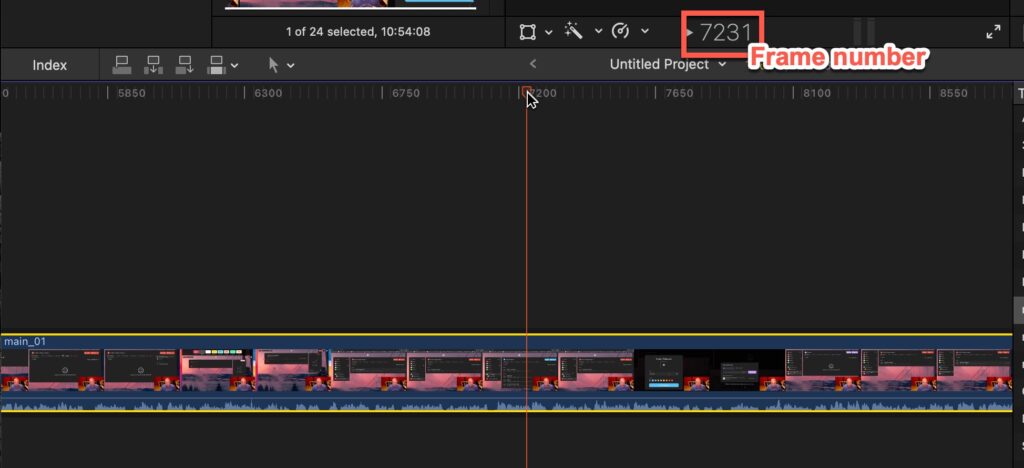
Scrub through your video until you arrive at the glitchy frame. Note the frame number in the screenshot above. You will need this later in the process.
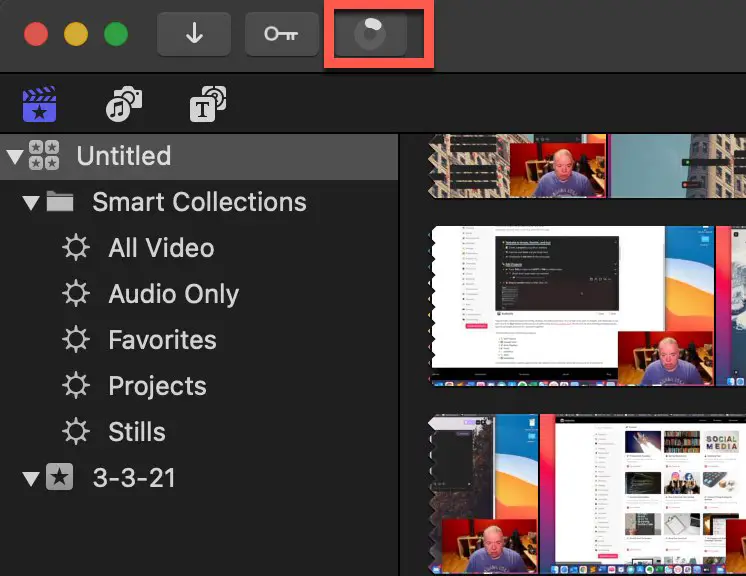
- Now, select the clip at the location and click Shift+F to find the original clip in your browser.
Type the Shift-F keys to select the original clip in the media explorer as shown in the screenshot above.
- Drag the original clip from the browser on top of the current glitchy clip. A popup will appear containing several options. In that popup, click on “Replace from Start.”
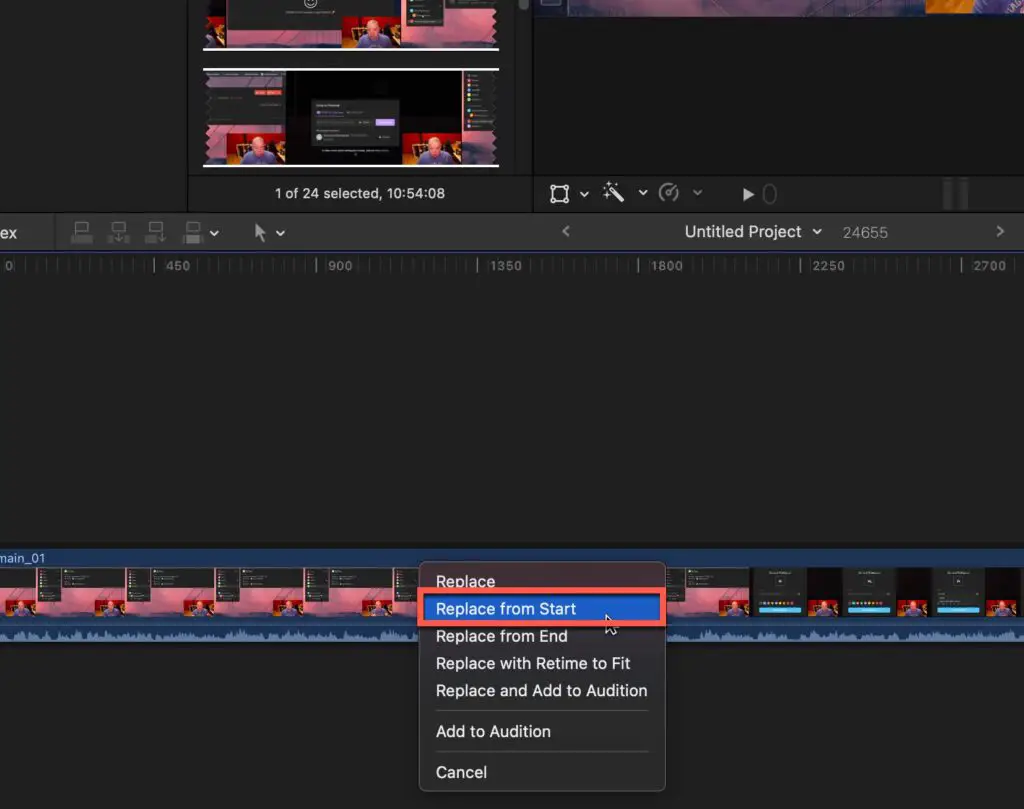
Next, drag the original clip from the media explorer onto the edited video clip in the project timeline. A pop-up menu will appear. Select “Replace from Start” to replace the current clip with the one from the media explorer.
Step 6: Now select the newly replaced clip and click on Edit > Paste Effects for pasting all the effects that you have copied on Step 3.
Step 7: Go back to the Preferences window. Set the Time Display back to the original time code and enjoy your glitch-free video!
If you are looking to learn how to keyframe video in Final Cut Pro, check out our Complete Guide to Keyframing in Final Cut Pro.
Deleting Render Files
If the first trick didn’t get the job done, you might want to try deleting your render files and re-creating them. Follow the below-mentioned steps to do that.
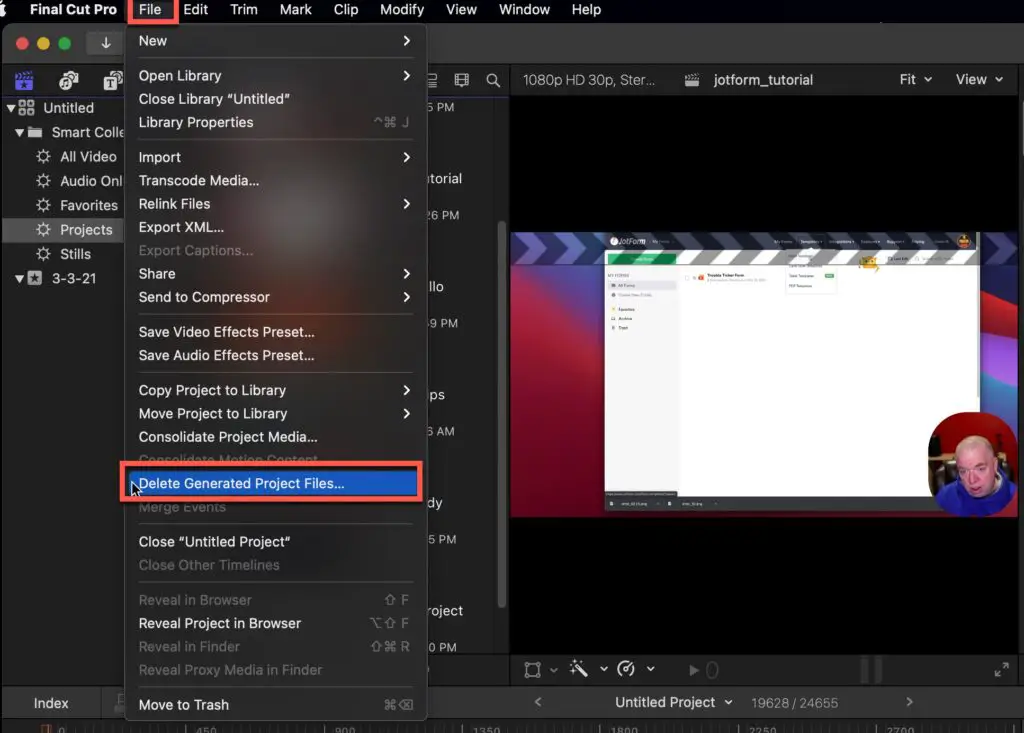
- Open your browser and select the project you are working on.
- After the first step, a window will appear. You need to navigate on its top menu and then click File > Delete Generated Project Files.
- Check the box saying Delete Render Files.
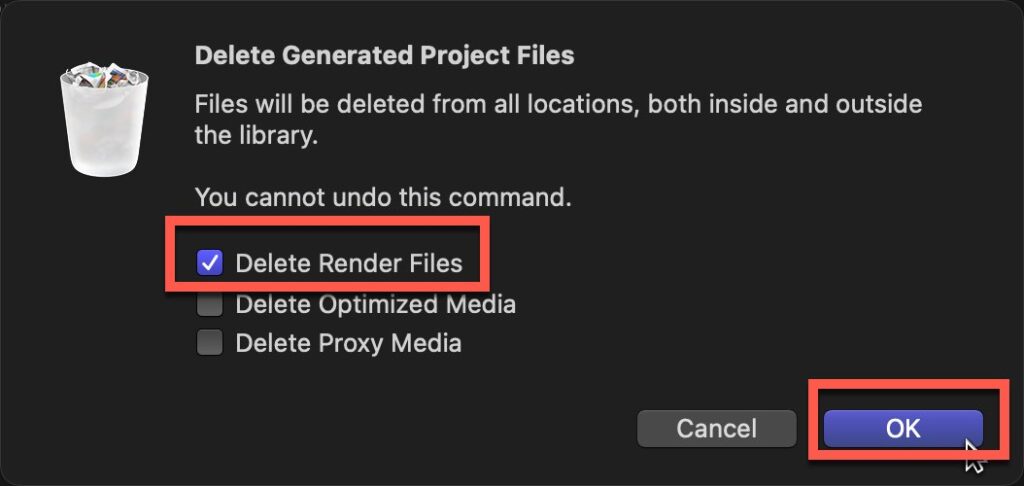
Click the “Delete Render Files”. This will delete your render files so only click if you are sure you want to delete it.
- Click OK.
And it’s done! After following the above four steps, you will need to reshare your project. It will take slightly more time because Final Cut Pro will have to create the render file (which we have deleted) again from scratch. Once it’s done, the glitch would probably be gone.
If you are struggling to manage render files or when and how to render files in Final Cut Pro, you need to check out our Complete Guide to Rendering Video in Final Cut Pro.
What Causes a Video to be Glitchy in Final Cut Pro?
Now that we have told you how to fix a glitchy/corrupted video, let’s understand what actually causes the glitch in the first place and how to remediate them.
| Causes of Glitchy Video | Potential Remediation Step |
|---|---|
| outdated effects and plugins | Ensure your plugins and effects are up to date and compatible with the version of Final Cut Pro you are using |
| Using too many effects | This occurs on underpowered machines. You can try limiting effects and using native effects over third-party effects |
| Not Enough RAM | Tricky as newer macs don’t allow you to upgrade memory once built. Try to close other applications and all Chrome tabs to maximize available memory for FCP |
| Slow Hard Drive Speeds | Upgrade to SSD drive if possible. |
How to Avoid Glitchy Video in Final Cut Pro?
Having to deal with glitchy videos can be very time-consuming and sometimes, overwhelming too. So, we are going to tell you some quick tips to avoid or reduce the chances of getting glitchy videos. Keep reading!
- Make sure to use the latest and updated version of Final Cut Pro.
- Avoid using any outdated third-party effects or plugins in your videos. Always look for the updated version of plugins and if you can’t find them, we recommend not using them at all.
- Free up your computer’s memory by removing all the trash, unnecessary files, and junk.
- Avoid editing or using extremely large images. They are known to cause problems in the video quality and also make the software slow. So, try to limit your photos to 5,000 pixels or less.
- Ensure to render each section of your video in smaller bites.
How to Stop Final Cut Pro from Lagging?
Finally, let’s look at some of the ways to stop Final Cut Pro from lagging and improve its speed.
- Create a proxy. This allows you to edit high-resolution videos but takes up only one-fourth of the actual file size, thereby boosting the performance of the software.
- Use keyboard shortcuts while editing to speed up the process.
- Close all the programs running in the background.
- Use optimized media footage to increase the speed of the software and stop it from lagging.
If you are looking to improve your video editing game, you must check out the mKeynote with iJustine Final Cut Pro plugin. It provides more than 100 clean, well-designed presets. For more information on the mKeynote plugin, click the link below:
