
Final Cut Pro is an Apple iOS video editing program that features an intuitive user interface and a comprehensive set of tools. In addition, this popular application utilizes video rendering processes to make video editing faster and simpler.
Final Cut Pro utilizes background video rendering to create temporary video and audio files that editors can manipulate and alter. Video rendering allows Final Cut Pro users to translate data into images, making it easy to trim videos, add effects, and insert text within the editing timeline.
This guide will explore all aspects of video rendering in Final Cut Pro. You can use this information to improve your editing skills, create higher-quality videos, and speed up the editing process.
If you are looking to master Final Cut Pro or any other applications in the video editing space, I highly recommend that you check out SkillShare. SkillShare offers a ton of great courses you can take for one low monthly fee.

I personally recommend Ali Abdaal’s Video Editing with Final Cut Pro X course. Ali does a great job of layering in each concept in a very easy-to-learn way that will have you becoming a Final Cut Pro ninja in no time.
How To Render a Video in Final Cut Pro
Video rendering in Final Cut Pro occurs automatically as a background function. Therefore, you won’t need to take extra steps to render a video unless you change the application’s default settings.
That said, users can opt out of automatic background rendering and manually manage render files.
How to Render a Video Manually in Final Cut Pro
To manually render individual clips in Final Cut Pro, do the following:
- Select the clip you’d like to render
- In the main menu, go to Modify -> Render Selection
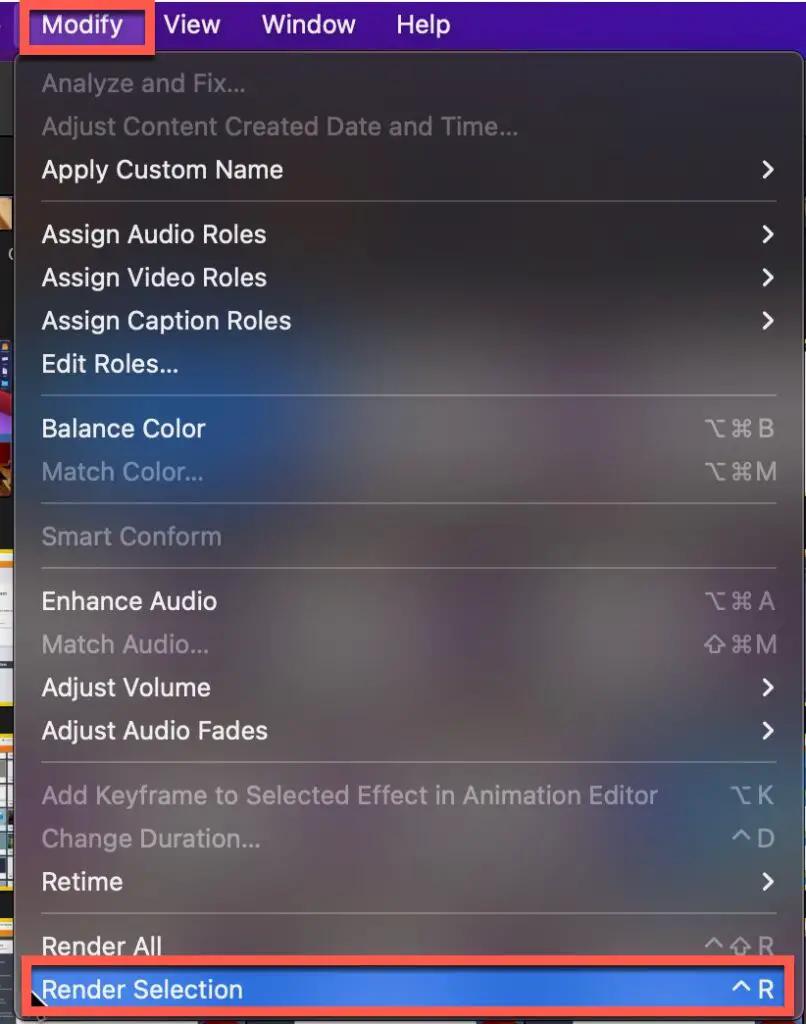
If you’d rather use a keyboard shortcut to render a single clip, you can press Ctrl+R.
Rendering all clips within the timeline is just as simple and utilizes the ‘Modify’ menu. Or you can use the keyboard shortcut Ctrl+Shift+R.
Looking to master working with video clips in Final Cut Pro? We have you covered with our Ultimate Guide to Working with Video Clips in Final Cut Pro.
What Is the Purpose of Rendering?
Video rendering transforms digital data into viewable images and frames. The video and image files on your computer or smartphone are essentially a form of data.
Without video rendering, editors need to use timestamps or have in-depth coding knowledge to alter videos and images. Essentially, the purpose of video rendering is to make digital images viewable.
Trying to mask video in Final Cut Pro and struggling? You need to read our Complete Guide to Masking Video in Final Cut Pro.
How Long Does Rendering a Video Take in Final Cut Pro?
The time it takes to render a video in Final Cut Pro varies depending on the size of the video, the quality of the video, and your computer’s hardware and specs. Larger, higher-resolution videos tend to take the longest to render, especially for those working on low-performance devices.
Still, editors can continue to work on projects while their media renders with the background rendering feature. Rendering times don’t often affect project finalization and video exportation.
If you are looking to learn how to keyframe video in Final Cut Pro, check out our Complete Guide to Keyframing in Final Cut Pro.
Does Rendering Affect Video Quality?
Rendering doesn’t affect video quality. During the rendering process, the previewable video may be less-than-stellar. Your videos and images should retain their original resolution and quality when the rendering process is complete.
However, there may be slight changes. For example, you may notice that the original resolution of your video file is significantly decreased or that frames are missing.
Of course, video editing software that uses a low rendering bitrate can decrease the original video’s quality. But Final Cut Pro uses a high rendering bitrate by default. Users can also adjust these settings, ensuring that video quality is unaffected.
What Is the Best Rendering for Final Cut Pro?
The best rendering settings for Final Cut Pro depend on the type of video files you’re working with, as well as your computer’s hardware. On outdated computers, editors using Final Cut Pro may want to stick with the default rendering settings to avoid lengthy rendering times.
Do I Need To Render My Video Before Exporting in Final Cut Pro?
You won’t need to render your video project before finalizing it and exporting it. That’s because video rendering in Final Cut Pro is typically an automatic background process unless you’ve changed this default setting,
Why Is Final Cut Pro Rendering So Slow?
There are several reasons why Final Cut Pro may be taking a long time to render your media files. One of the most common culprits is outdated hardware. Low-performance computers or devices can struggle to process information quickly, resulting in a slow rendering process.
But another aspect to consider is transcoding. Quite a few video file types are available to editors and filmmakers, including MP4, MOV, WMV, and AVI. Each of these file types utilizes a specific codec to ‘pack’ and ‘unpack’ video files.
Because Final Cut Pro is an Apple-specific application, editors should convert non-compatible video files (WMV and AVI files) to accepted file types like MOV and MP4. Doing so can increase your video’s quality and make it easier for the program to render video files.
How To Make Final Cut Pro Render Video Faster
Generally, larger and more complex video projects will require more time to render. So, HD 1080p videos with tons of effects, added text, or filters will naturally take longer to finish rendering.
That said, editors can make the rendering process slightly faster by adjusting the Final Cut Pro playback settings.
To access the rendering settings in Final Cut Pro, do the following:
- Select the primary Final Cut Pro tab at the top left of the application. This will open a drop-down menu.
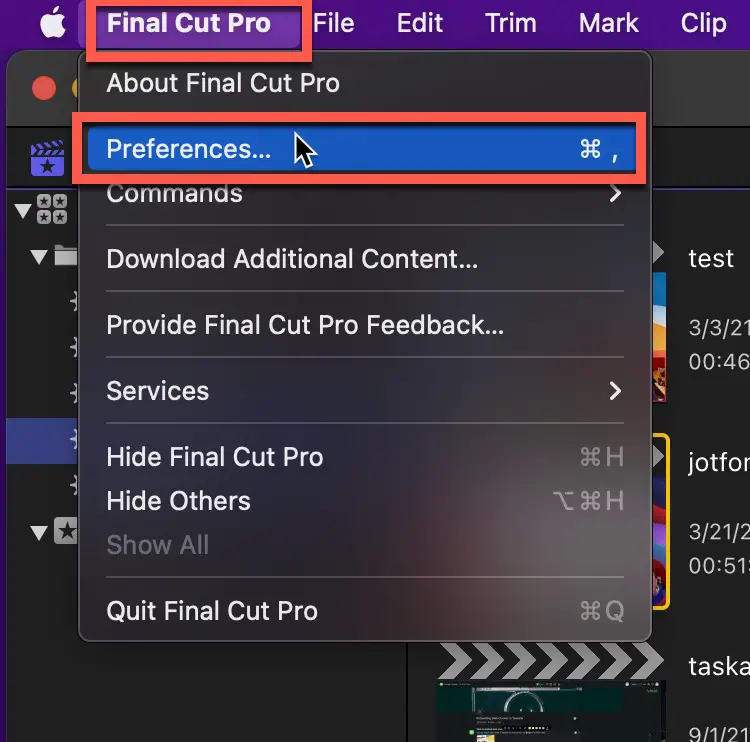
- Select ‘Preferences’ and wait for the new menu to open on your screen.
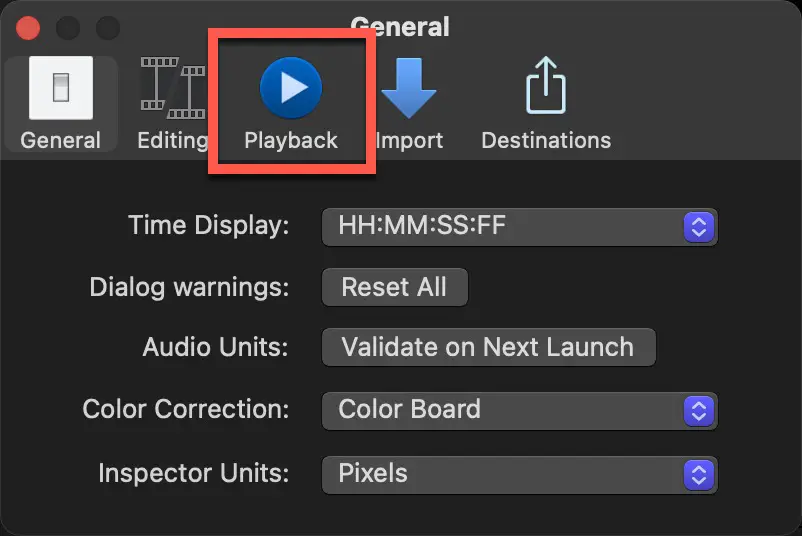
- Select the Playback icon. From here, you can choose to disable background rendering and adjust rendering start times. Disabling background rendering will enable you to render manually, occasionally quickening the overall rendering process.
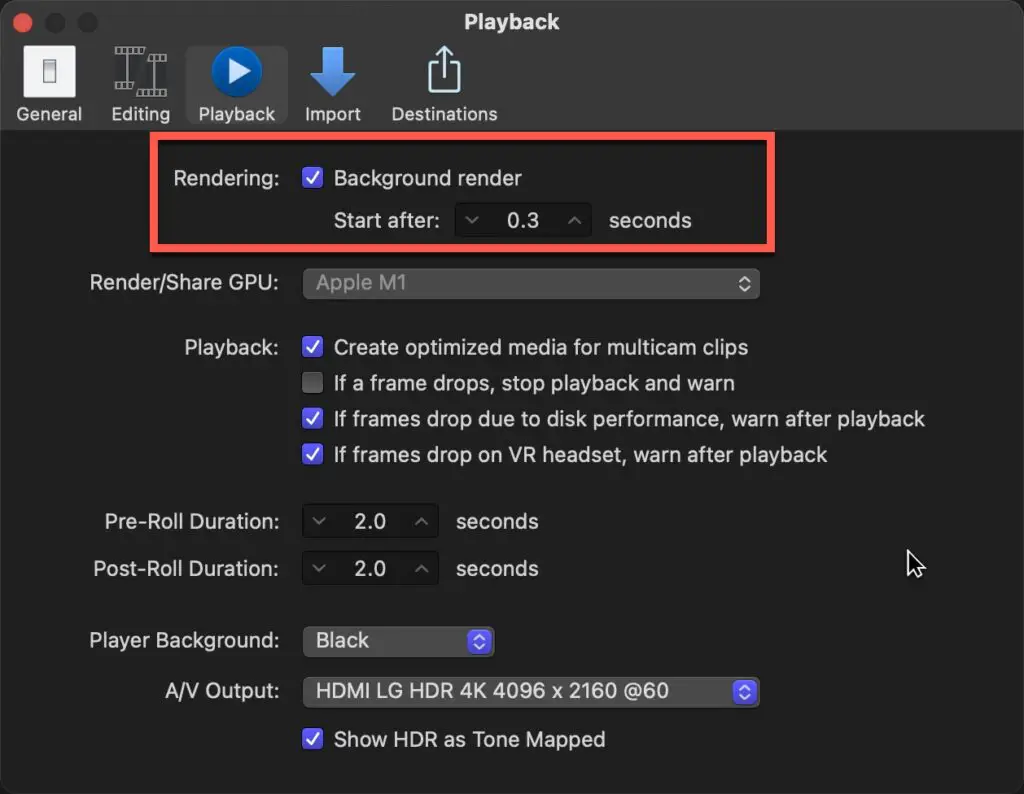
After all, if your timeline contains a clip that’s heavily altered (via effects, overlaid text, or filters), choosing to manually render those performance-intensive clips first can significantly reduce the overall rendering time.
Looking to learn how to use generators in Final Cut Pro to add cool backgrounds, titles, and effects to your videos? Check out our Detailed Guide to Using Generators in Final Cut Pro.
Can I Delete Render Files From Final Cut Pro?
You can delete render files from Final Cut Pro, which frees up space on your hard drive or external storage device.
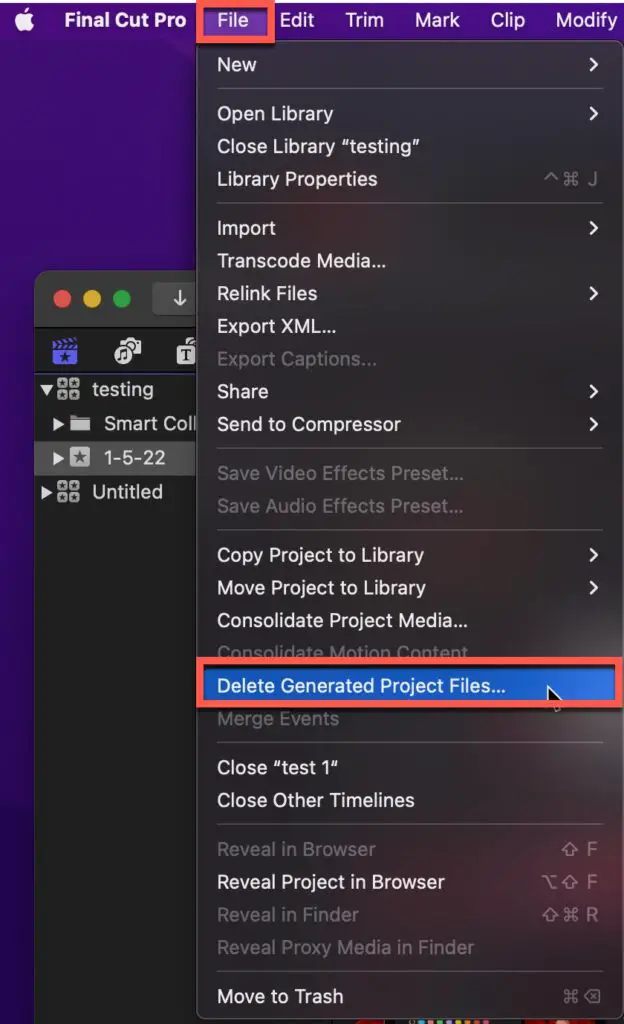
To delete old render files from your library, do the following:
- Access the Final Cut Pro library and select the ‘Library’ tab.

- Click on the project file to select it.
- In the main menu, go to File -> Delete Generated Project Files
- In the “Delete Generated Event Files menu”, check Delete Render Files
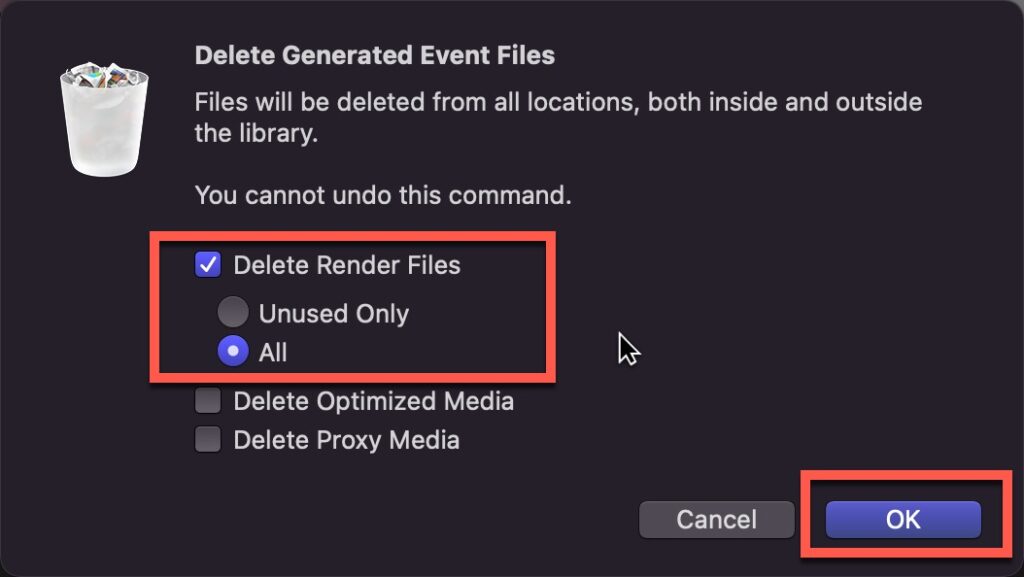
You’ll then have the choice to delete all render files (including the ones you may be using for a current project) or delete unused render files.
- Click the “OK” button to save your settings
Conclusion
Unlike many other video editing programs, Final Cut Pro renders elements within the timeline without direct user commands. This background rendering reduces total editing time and ensures that the final exported video consists of high-resolution images and minimal dropped frames.
If you are looking to improve your video editing game, you must check out the mKeynote with iJustine Final Cut Pro plugin. It provides more than 100 clean, well-designed presets. For more information on the mKeynote plugin, click the link below:
