
The thumbnail is one of the most important parts of your video. It will be the first thing the user sees, convincing them to click on your content. So…
How to Make a Thumbnail in iMovie
You will need to go through the video and find the right frame. Pause the video at that moment and save it as an image. From there, you’ll be able to export it to editing software so you can make the finishing touches.
Thankfully, getting the thumbnail right doesn’t have to be difficult. Keep reading to learn how you can make a thumbnail in iMovie.
If you are looking for improve your video quality at a reasonable price, you really should check out the Canon M50. I use this camera for my main YouTube channel and it does an amazing job at a budget price.
For more information on the Canon M50, check it out here.
How to Make a Thumbnail in iMovie on MacOS
The best option is to take a screenshot of the video. To do this, you will need to follow these steps:
- Open the movie in the app.
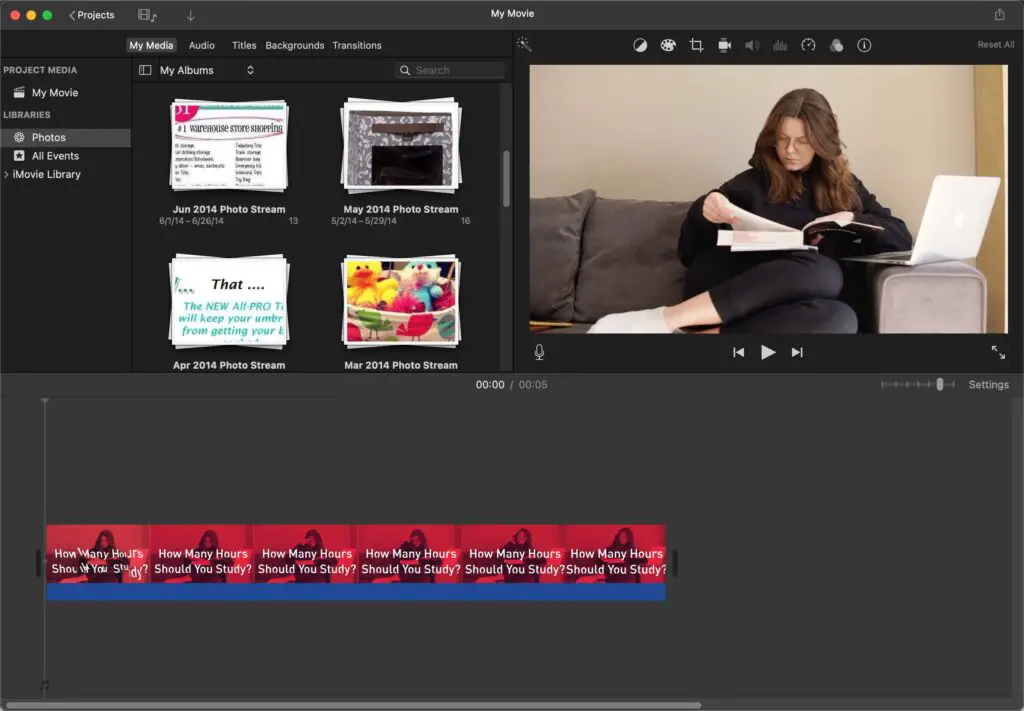
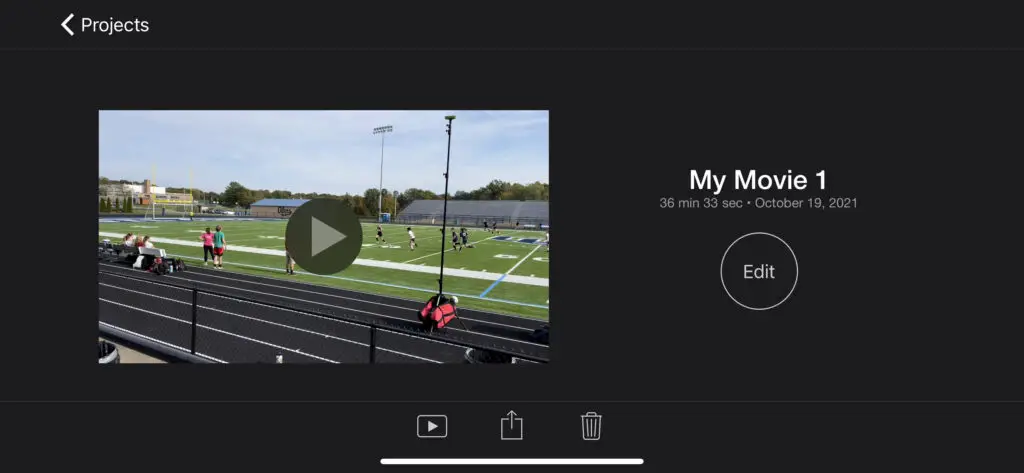
Open up iMovie on your Mac. Next, open up the project that contains the frame you want to use as a thumbnail as shown above.
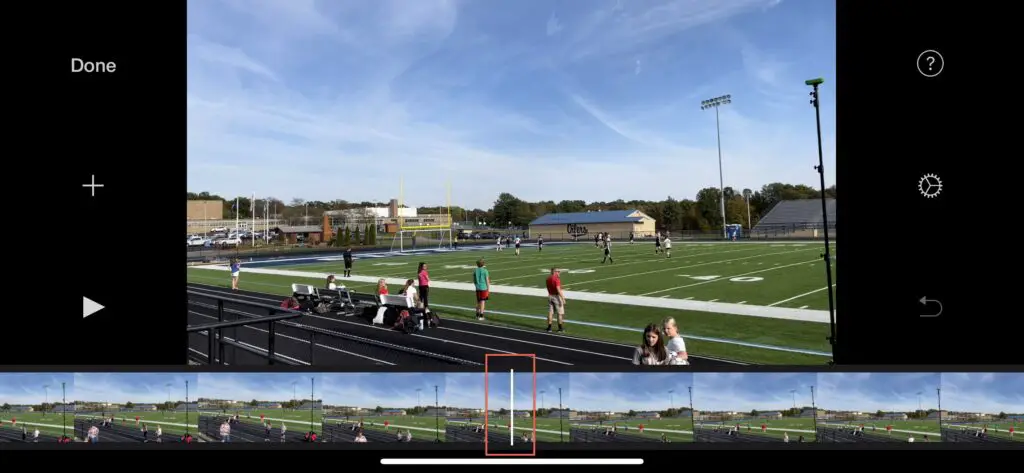
- Position the cursor line on the frame that you want to use for the thumbnail. You will be able to see what image you are selecting in the preview screen, on the upper right.

Next, go to your project timeline. Scroll through your timeline until you find the frame you want to use as your thumbnail. Position your cursor on the frame by clicking the cursor and dragging it to the frame position you want as shown in the screenshot above.
- Go to File -> Share -> Image
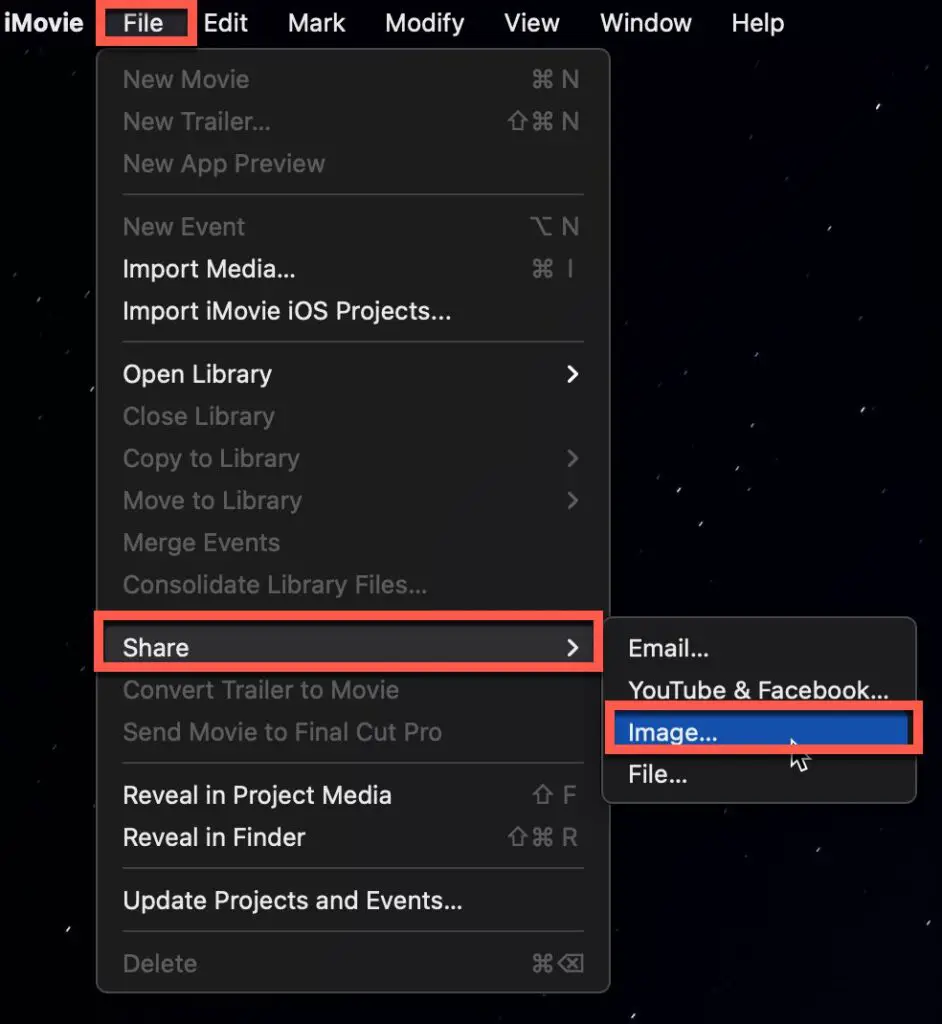
In the main menu, go to File -> Share and select Image from the available options as shown in the screenshot above.
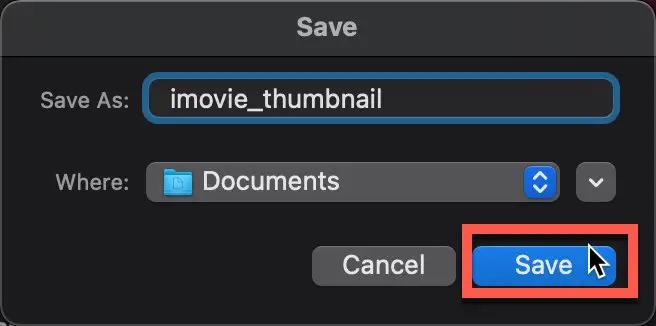
- This will allow you to save the image and move it to your editing software or service like Canva.

You now have a thumbnail image that you can edit in photo editing applications like Photoshop or Affinity Photo. Alternately, you can use a service like Canva to edit the thumbnail as shown in the screenshot above.
Have you ever wanted to create a looping video in iMovie? If so, check out our Complete Tutorial on Creating Looping Videos in iMovie.
How to Make a Thumbnail in iMovie on iPhone (iOS)
If you are planning on making a thumbnail on iPhone or iPad, you will need to follow a slightly different procedure. In this case, you’ll need to follow these steps:
- Open iMovie and press on the project you want to make a thumbnail for
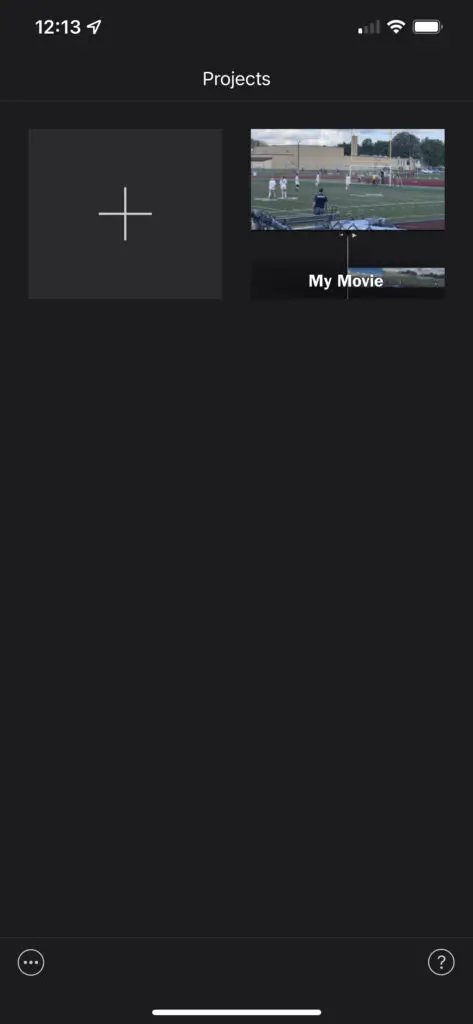
Open up iMovie on your iPhone. Press on the project you want to create a thumbnail for.
- Hold iPhone in Landscape mode (sideways)
Hold your phone sideways to put iMovie in landscape mode as shown in the screenshot above.
- Move through the movie until you find the image you want to use for your thumbnail.
Scroll through the video until you arrive at the frame you want to use as your thumbnail. Make sure you place your cursor on the frame you want (the frame should appear in the video window as shown above).
- Press the Increase Volume button and the Power Button to take a screenshot of your screen
The next step is to take a screenshot of the video frame. To take a screenshot on your iPhone, press the Increase Volume and Power buttons at the same time. You should see a screenshot in the lower-left corner of the phone.
Press on the screenshot window to edit it.
- Drag the crop window to fit around the video window

We only want the video window part of the screenshot so we need to crop it. Drag the crop controls to fit around the video window as shown in the screenshot above.
Once you have the crop frame is set, press the “Share” button as shown above.
- Choose the “Save to Files” option in the “Share” menu

You should now see the Sharing menu options. Scroll down and select “Save to Files” from the available options. This will save the screenshot to your Files app on your iPhone.
Struggling with glitchy or choppy video in iMovie? You must read our Ultimate Guide to Fixing and Avoiding Glitches in iMovie.
Should I Make Thumbnails in iMovie?
Hopefully, you have a better idea of how you can make a thumbnail in iMovie. However, this raises an important question.
Should You Make a Thumbnail Using iMovie?
Usually, the answer will be no. While iMovie might be a good basic program to use for editing your videos, it won’t be the right solution for making a thumbnail. Often, you will have to resort to taking a screenshot and editing it in a second program.
This can be irritating, especially if you are making videos for YouTube, where the thumbnail will often determine whether or not someone clicks on the video.
The good news is that there are plenty of other programs that you can use. One of the best options to explore is Canva. There are a few reasons why this tool is so popular. These include:
- Ease of use. Canva will be easy for you to use. You should be able to pick up the basics within a few minutes. If you ever get stuck, there are plenty of online resources to help you out.
- Wide range of features. There are plenty of innovative features that you’ll be able to use to edit your thumbnails. This will ensure that your thumbnails will look exactly the way you want them to.
- Free to use. Like iMovie, Canva will be free to use. Though you might need to pay to use some of the premium features.
- Wide range of templates. If you are planning on making a thumbnail, there is a wide range of template options to choose from. Many of these are free. From there, you’ll be able to customize the image, personalizing it to suit your video.
Now that you have a better idea of why you should use Canva, here are the steps to follow to get a great thumbnail:
- Log in to the Canva app.
After you’ve done this, you will be taken to the app’s dashboard.
- Choose a template.

This is one of the most important parts of the process, determining the way that thumbnail will appear. There are plenty of options to choose from. All you need to do is search for “YouTube Thumbnails”.

Then, select the one that best encapsulates the feel of your video.
- Customize the template.
There are plenty of ways that you can make the template work for you. For example, you might want to change the color of the text or how large it is. Feel free to play around with these settings. Canva should make it fairly easy for you to manipulate them.
- Choose your thumbnail image.
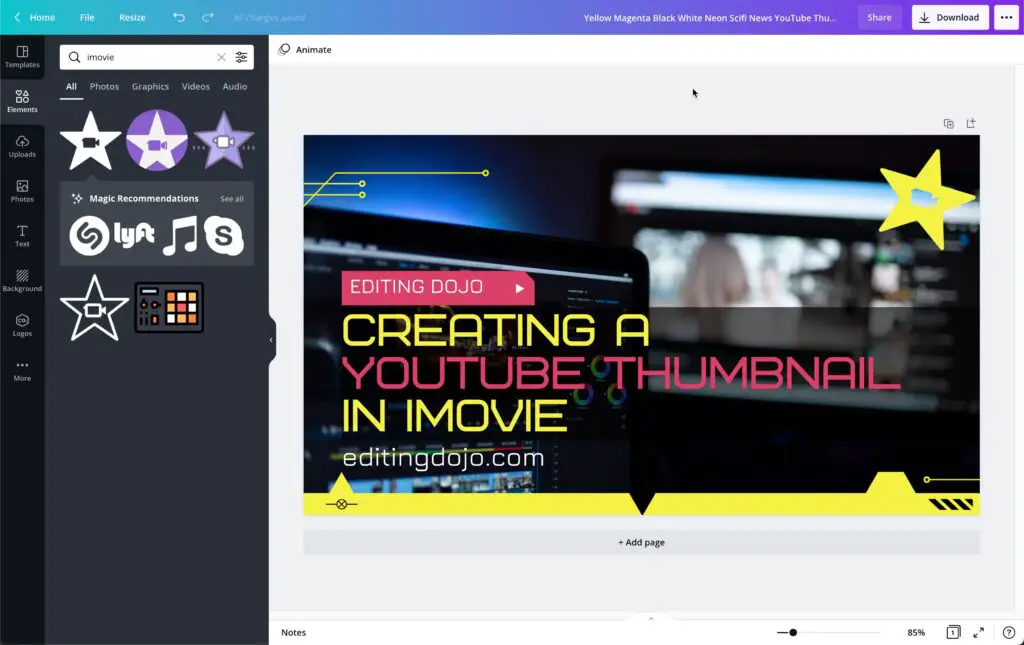
Next, it’s time to decide what image from the video will become the basis of your thumbnail. There are a few ways to do this.
First, you can upload an image from your files. This is best if you were using iMovie to edit the video. We discussed how to get a screenshot earlier. Drag your screenshot onto the Canva template to add it to your template.
- Click the Download Button to save your thumbnail to your computer.
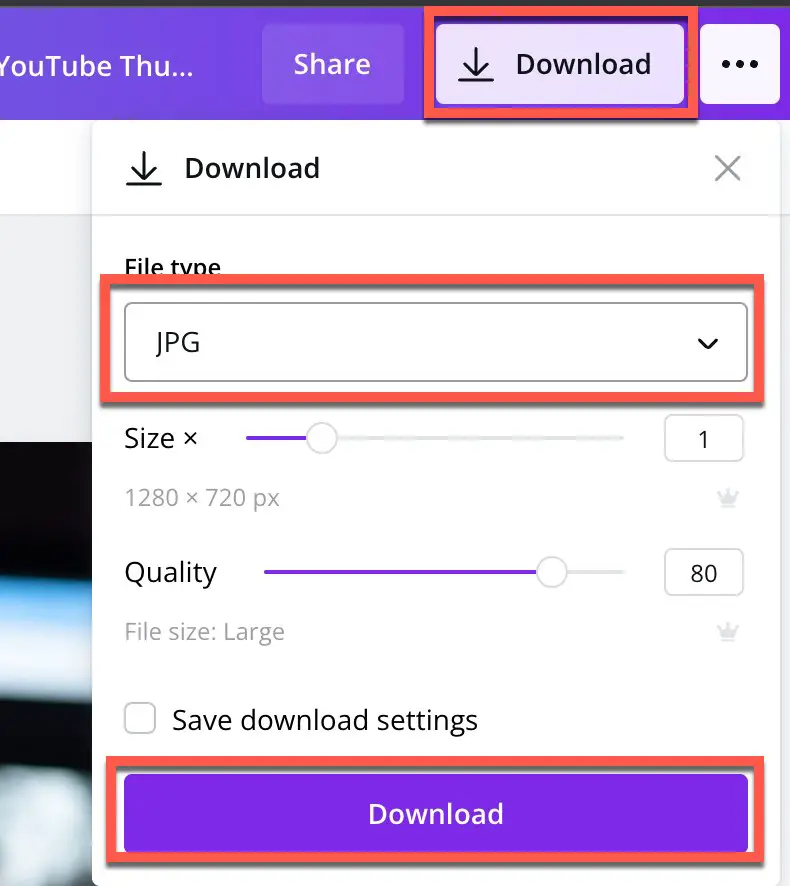
Once you have the thumbnail template the way you want it, click the “Download” button at the top of the Canva window. Select JPG as the file type and click the “Download” button at the bottom of the download menu as shown in the screenshot above.
Looking for help working with audio files in iMovie? Check out our Complete Tutorial on Working with Audio in iMovie
Final Thoughts
The thumbnail is one of the most important elements of any YouTube video. It’s the best way to grab someone’s attention, so they want to hit play. While you can make a thumbnail using iMovie, it’s probably best to use Canva. This software will make designing thumbnails a breeze.
There is an amazing iMovie course, The Complete Guide to iMovie from Beginner to Expert that I recommend you check out.
