
Final Cut Pro is one of the most user-friendly editing software in today’s market, as the program provides you with all the tools you need and an easy-to-navigate interface. However, when it comes to blending audio, there isn’t a one-size-fits-all setting that could automatically help you fuse two or more clips. Luckily, through a bit of practice and research, I guarantee you’ll be able to blend audio in Final Cut Pro in no time.
You can blend audio in Final Cut Pro either by layering it or fading it out. Crossfade is the most common type of audio transition used by Final Cut Pro users, as it allows for a seamless adjustment from one clip to the other.
I’ll take you through everything you need to know about blending audio in Final Cut Pro. First, I’ll cover the layering process and then explain how to fade out audio using the software in more detail. Lastly, I’ll teach you more about the audio editing techniques you can carry out using Final Cut Pro.
Can You Layer Audio in Final Cut Pro?
Yes, you can layer audio in Final Cut Pro. After importing your video clips onto the software, you can detach the audio. The audio clips will appear in their respective lanes, allowing you to click, drag, and adjust as necessary.
How To Layer Audio in Final Cut Pro
As you can see, the software’s layering process is relatively easy to understand and execute. However, in such an advanced program with so many features, it can be challenging to find (and remember) the correct option you’ll need to select to get the job done.
Before starting, ensure that you’ve imported both (or more) clips you’ll be using onto the software. Additionally, clearly labeling the videos can help you differentiate between them better during the editing process, which can be essential if you’re working with more clips.
Afterward, here’s what you’ll want to do to layer audio in Final Cut Pro:
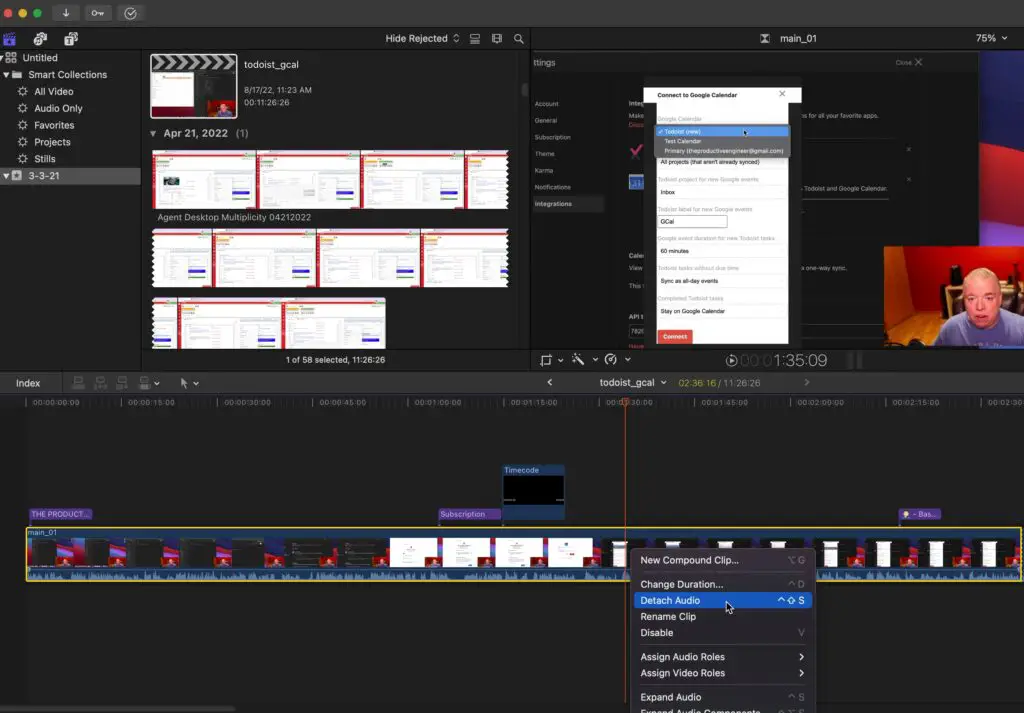
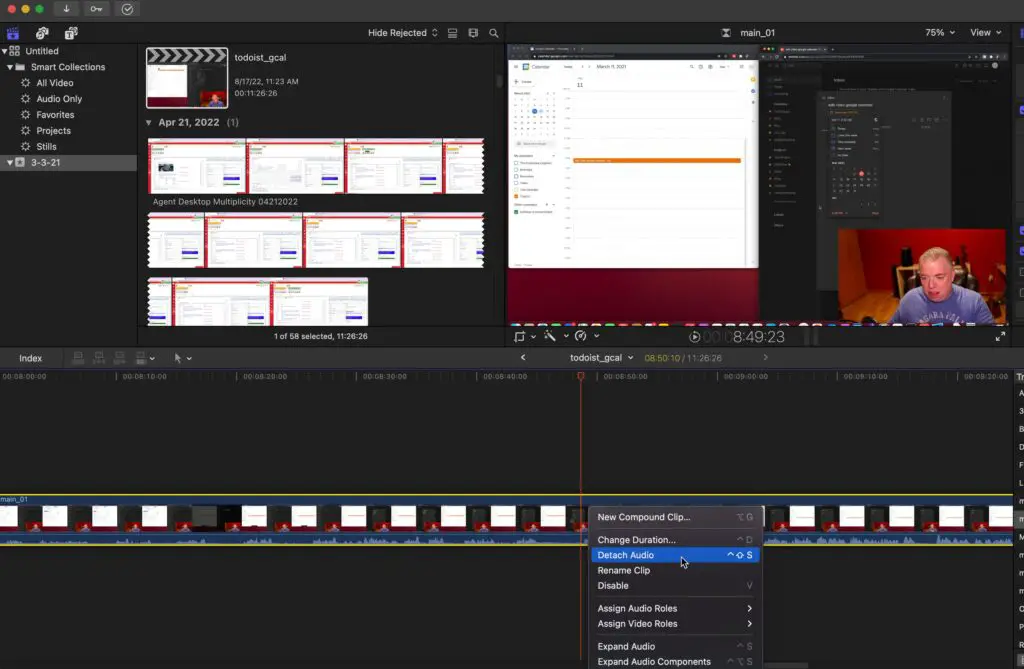
- Detach audio. Right-click on a clip you’ll be working with. A menu should pop up, including a ” Detach Audio” tab. Click on it. Repeat the process with as many clips as you want to layer.
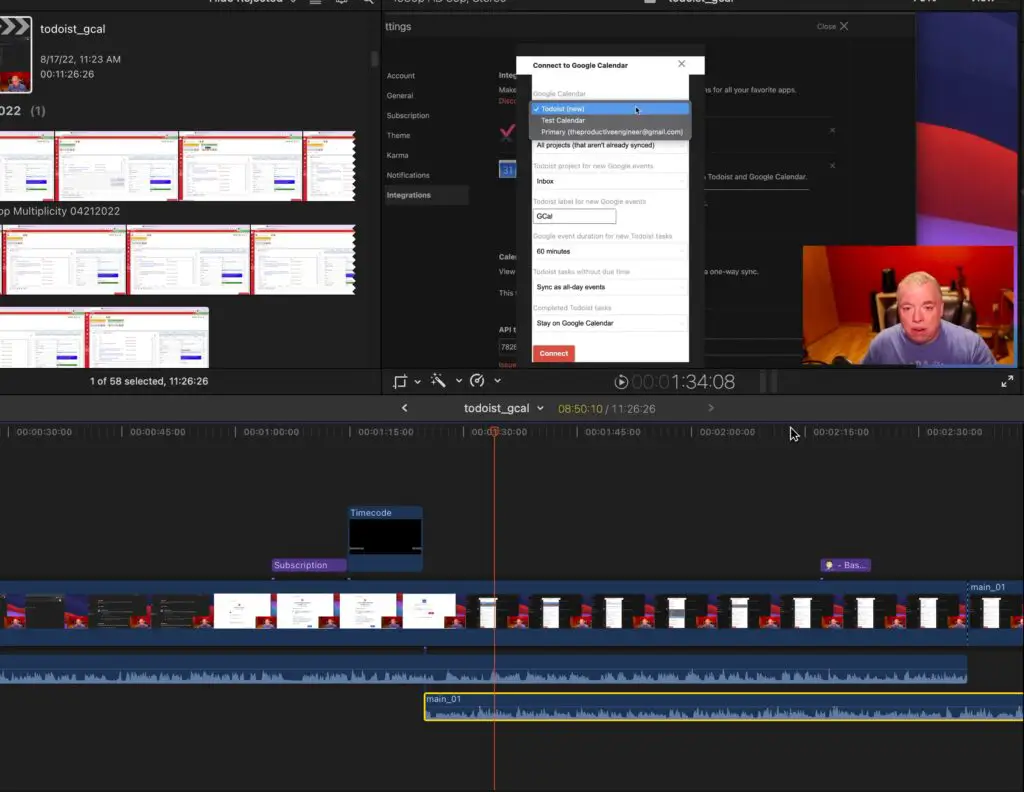
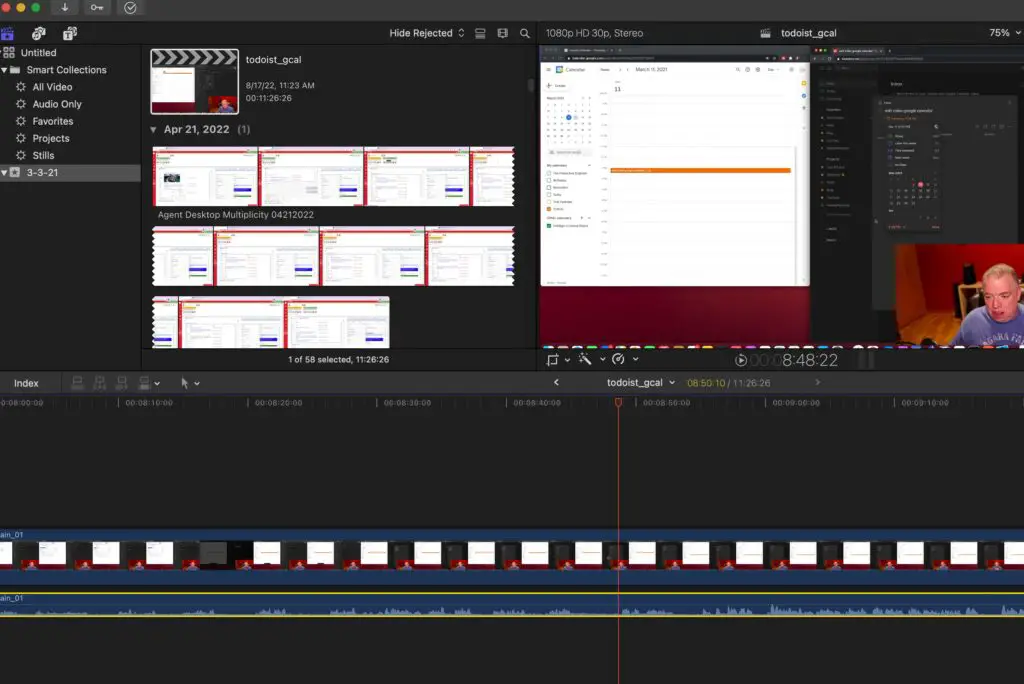
- Adjust the audio clips as necessary. After clicking on “Detach Audio,” the audio clips should appear separately from their visual counterparts. When this happens, you can freely click on an audio clip and layer it over another one simply by dragging your cursor around until you’re satisfied with the layering placement.
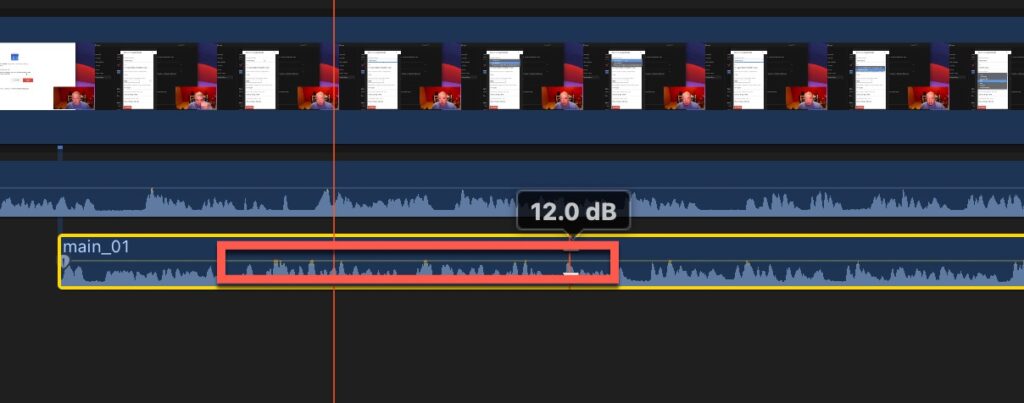
- Adjust the volume. Given that you’re working with a few different clips, the chances are that even though the timing of your layering might be perfect, the result still sounds unpleasant due to issues with the volume ratio between them. You can adjust each clip’s value by clicking on the thin yellow line on the clip and dragging it up or down, depending on what you’re looking to achieve.
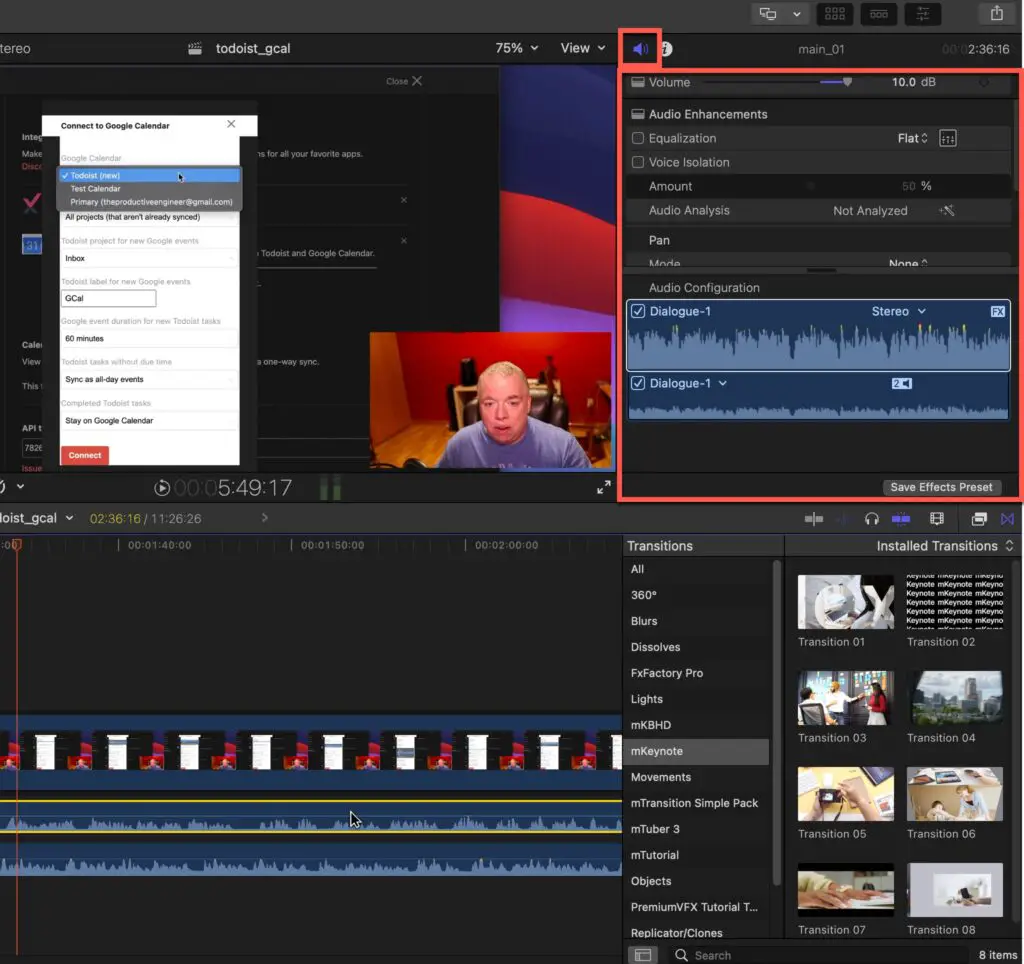
- Enhance the audio. Now that you’ve successfully layered your audio clips, you might want to work more on the quality and features of the result you’re trying to achieve. You can find all additional configuration settings on the menu by clicking on the volume button that appears in the upper right corner of the screen as shown in the screenshot below.
Have you needed to loop video inside of Final Cut Pro? We have you covered with our Ultimate Guide to Looping Video in Final Cut Pro.
How To Fade Out Audio in Final Cut Pro
Here’s how you can fade out audio in Final Cut Pro:
- Detach the audio. Using the previously mentioned approach, detach the audio to appear separately from its visual counterpart.
- Select the audio clips you’ll want to adjust. Click on one or several audio clips, depending on what you’re trying to achieve.
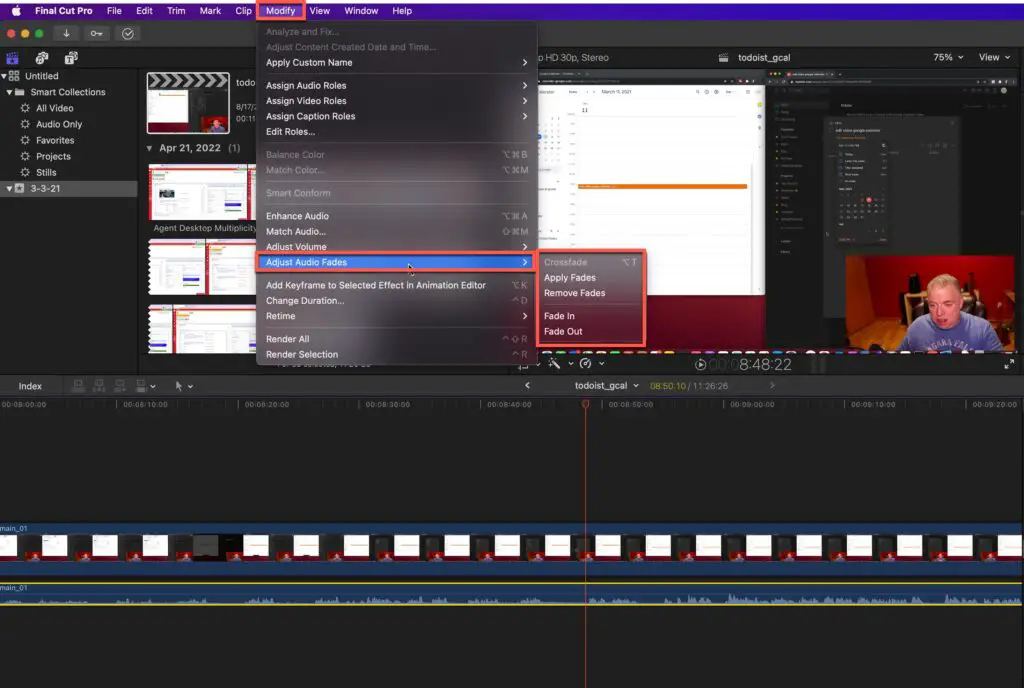
- Apply the fades. After selecting your desired clips, you’ll want to click on “Modify” and then “Adjust Audio Fades.” From there, you can choose to apply the fade at the beginning of the clip by selecting “Fade In,” you can have it at the end by selecting “Fade Out,” or you can apply the effect both at the beginning and end of your clip by clicking on “Apply Fades.”
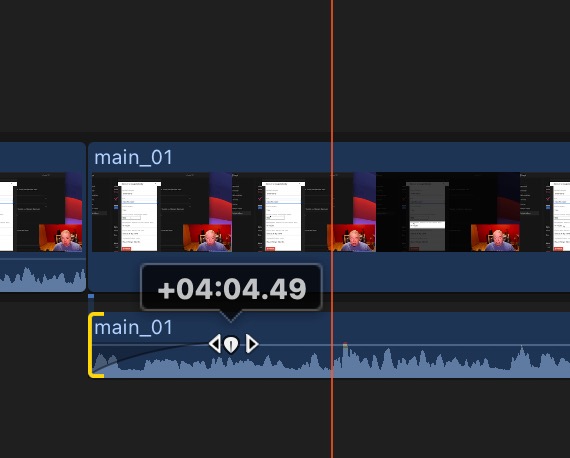
- Adjust the duration of the fade. A fade bar should visually appear after applying the fade to any selected clips. By dragging it across the clip (as shown in the screenshot below), you’ll be able to determine where you want the effect to start and end. Alternatively, you can change the default duration applied every time you use this tool by adjusting your editing preferences.
Looking to learn how to use generators in Final Cut Pro to add backgrounds and effects to your videos? Check out our Ultimate Guide to Using Generators in Final Cut Pro.
Can You Edit Audio in Final Cut Pro?
You can edit audio in Final Cut Pro. The software offers a wide range of user-friendly tools to help you edit and adjust audio clips to your liking. Their extensive range of possible audio edits includes voice effects, enhancement, voice removal, and many more features.
Even if there’s a specific editing tool that you can’t seem to find, you can always install a few third-party plugins to make your editing experience as convenient as possible.
Final Cut Pro allows you to do both clip-level and advanced multichannel audio editing. For example, the processes mentioned in the previous sections fall under the clip-level editing category. They allow you to make changes to entire audio clips with relative ease.
On the other hand, multichannel audio editing allows you to group channels depending on specific audio components. This feature will enable you to make simultaneous changes across different clips, making the final audio track sound seamless and coherent.
However, if there’s a specific range you want to work on, you can always use the Range Selection tool to pick out the component you’re interested in editing manually.
Editing a specific range doesn’t have to be different from editing clips. Therefore, all the instructions I gave you would work well if you’re dealing with a manually-picked range.
Final Cut Pro has got you covered, whether you want to skim, adjust, extend, mute, fade, or add audio effects. For more information on how to better use the software for audio editing, check out this introductory page Apple has put together.
Final Thoughts
Blending audio in Final Cut Pro doesn’t have to be time-consuming or complicated. Whether you’re looking to layer or fade your audio clips, by following a few quick, easy-to-follow instructions, you’ll be able to start blending audio like an expert in no time.
Final Cut Pro offers a wide range of tools and settings to help you achieve the exact audio result you’re looking for.
If you are looking to improve your video editing game, you must check out the mKeynote with iJustine Final Cut Pro plugin. It provides more than 100 clean, well-designed presets. For more information on the mKeynote plugin, click the link below:
